
Planning to do the incredible overnight Acatenango Volcano hike in Guatemala?
Our guide covers everything you need to know + expect before you start.

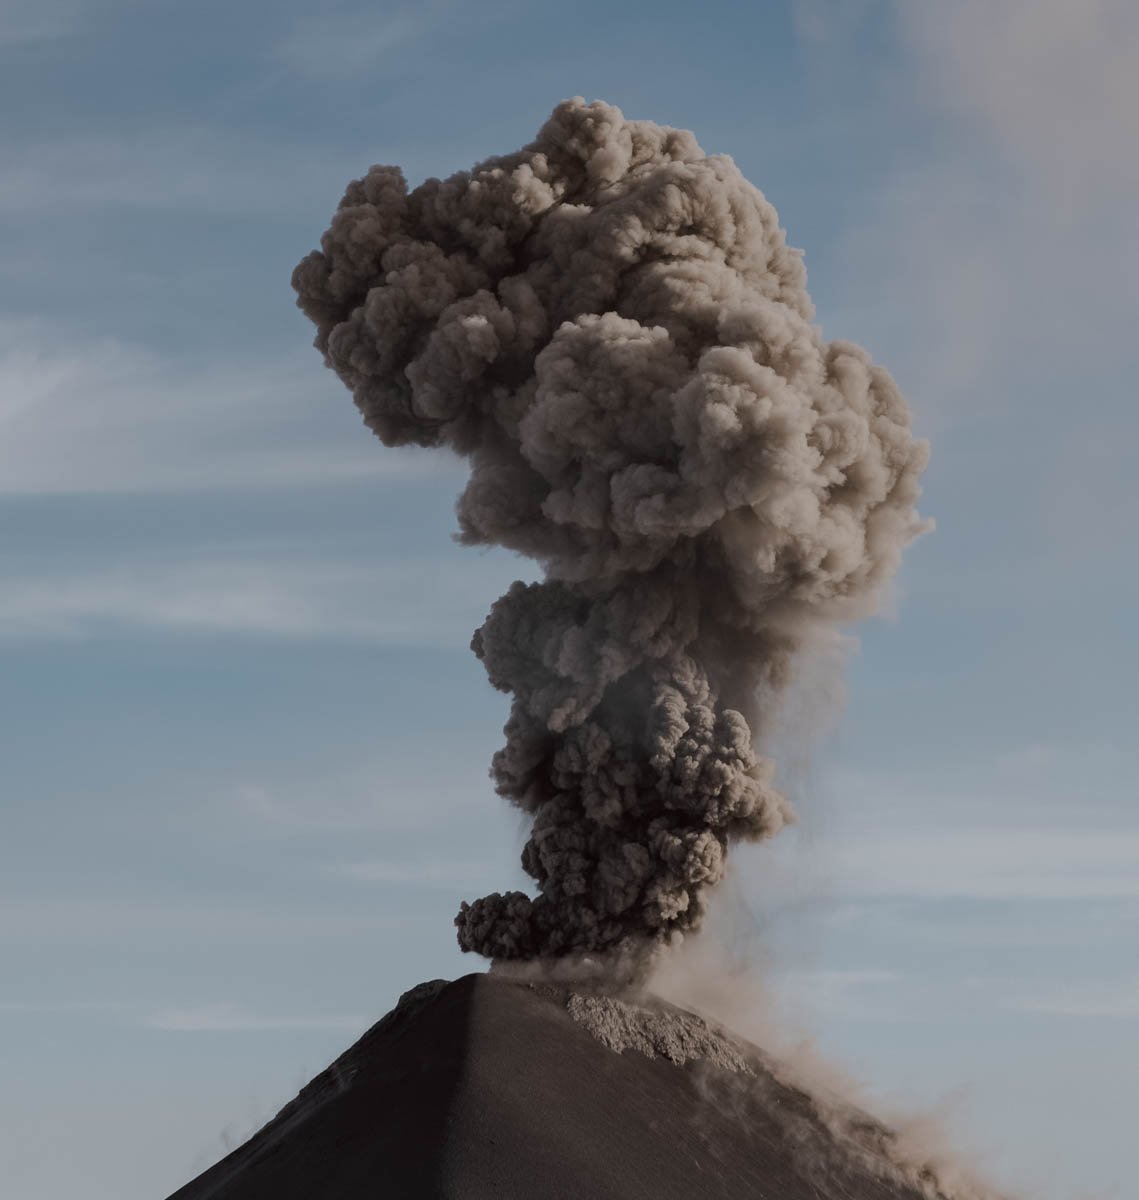
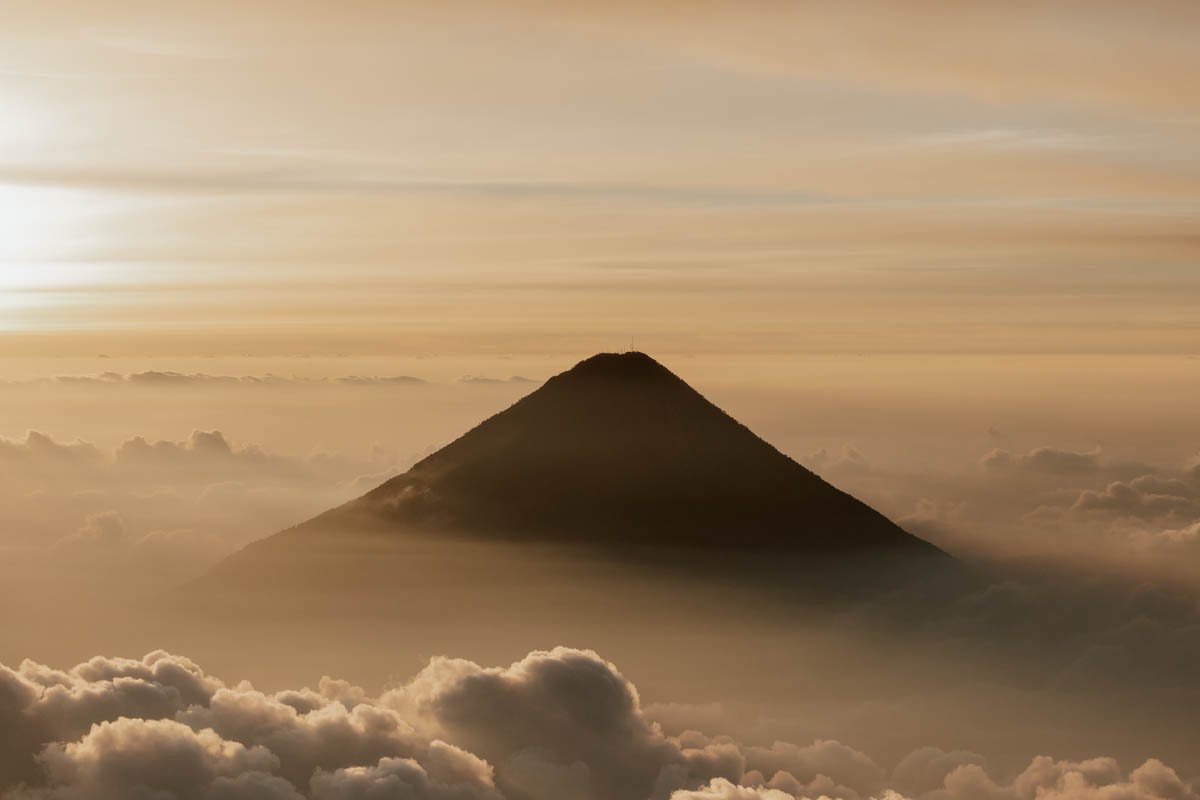
The first eruption would have been enough.
With a slow-motion burst of black smoke, Central America’s most active volcano greeted us at our campsite with an apocalyptic sight and sound.
Time was measured not by watches or smartphones, but the rhythmic rumbling and explosions of rock and ash. Some would be short and brief, others an operatic detonation that you could feel in your bones. When darkness fell, the fires of hell spewed forth to burn a trail in the night sky
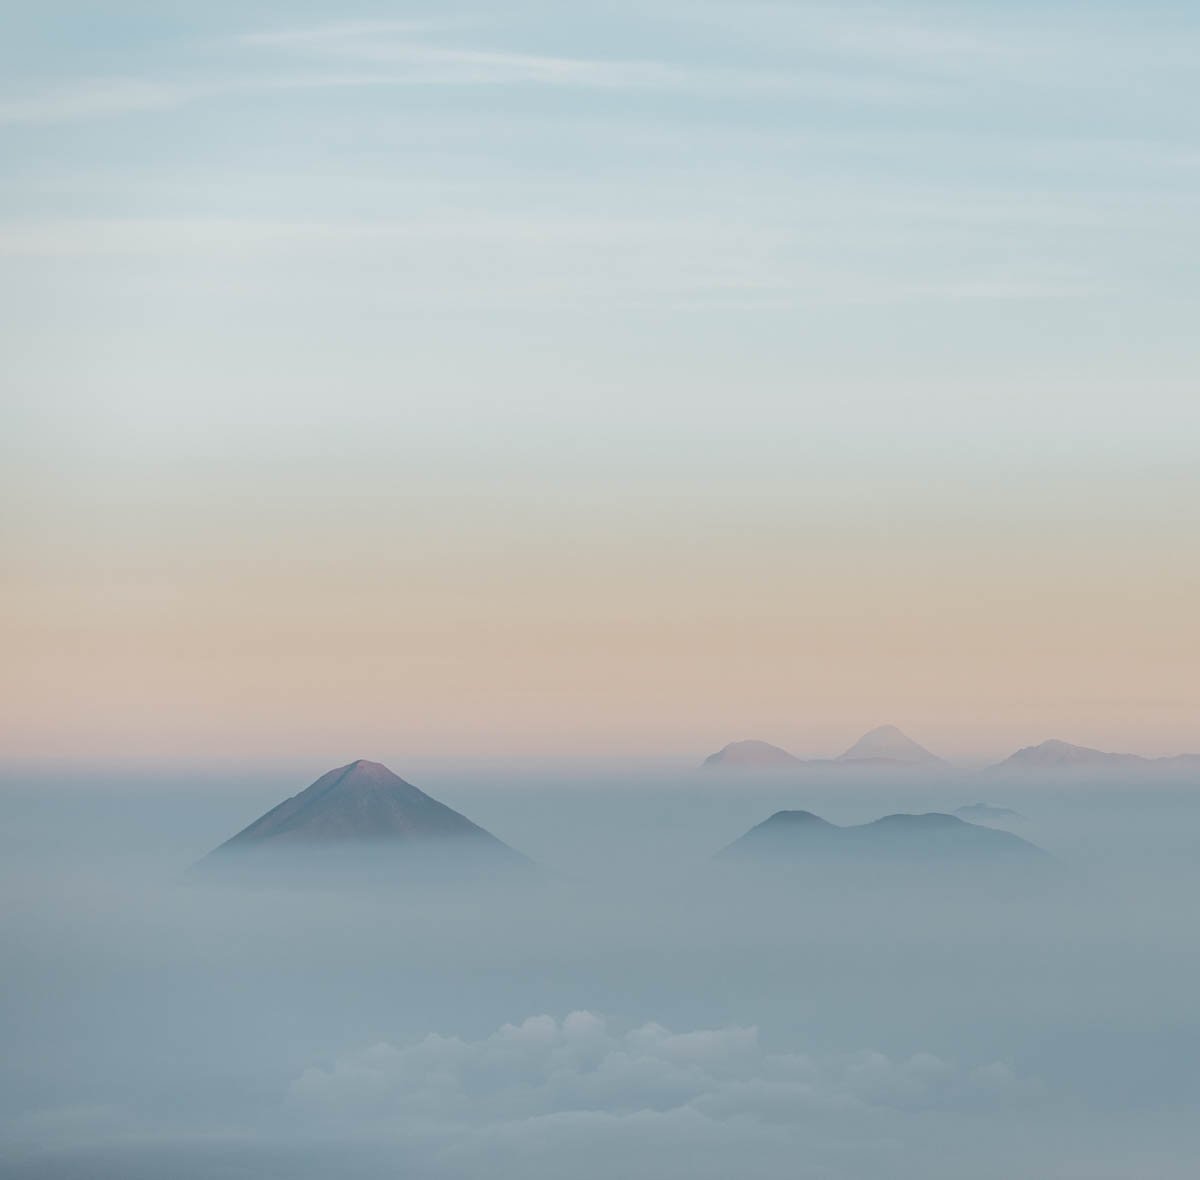
At Along Dusty Roads, we don’t deal in hyperbole, and this view from our basecamp in Acatenango was truly was one of the most incredible things we’ve witnessed on our travels.
-
Hiking one volcano to see or reach another volcano is, to be honest, a very Guatemalan travel activity. The Central American country is stuffed to the brim with volcanic peaks and some itineraries revolve around just how many they can summit or squeeze into a month.
Across two trips to Guatemala, we’ve now hiked five of her seven most famous volcanoes (with two still on the to-do list due to pesky bandits making them too risky). Whilst some have been more enjoyable or challenging than the famous Volcan Acatenango hike, none offered such a spectacular crescendo or overnight camp setting.
We came close to missing all that though, due to a rogue tour operator and an eleventh hour cancellation causing a last-ditch scramble in Antigua for us to find two last-minute spots on an overnight tour.
The silver lining? Aside from being able to give you an honest view what to expect on this popular but challenging hike, we discovered a lot about the differences between the various Acatenango overnight tours available. Whilst all follow a similar schedule, they do not offer an equal experience and, as this is such a popular high-altitude group hike involving an overnight camp in basic conditions on the side of a steep volcano, that can make a big difference.
In this practical guide, we want to share everything you really need to know before hiking Volcano Acatenango so you can have the most unforgettable experience up there, but also confidently decide if you want to do it, know where to include it in your Guatemala itinerary, find the right tour for your budget & travel style, and understand exactly what you’ll need to bring or borrow.
We know that lots of travellers will attempt Acatenango who aren’t necessarily hikers or that outdoorsy and, if this applies, it’s even more important to prep & plan accordingly as some people find the hike to be a real physical and mental challenge.
So, we’ll cover everything from the logistics and actual difficulty of the 18km out-and-back trail, to dealing with the altitude, the optional hike beyond to Fuego, knowing exactly what to bring & borrow, travel better tips, and common mistakes to avoid.
This is our essential guide to hiking Volcan Acatenango overnight and for sunrise.
the essentials
· Volcan Acatenango is 3,976 m (13,045 ft)
· Joined to, and overlooking, the very active Volcan Fuego
· 18km (11miles) out-and-back trail
· Overnight hike is best option to see day + night eruptions, as well as a spectacular summit sunrise
· Many first-time hikers find it very challenging
· November-April has best conditions + visibility; rainy season hikes more challenging and overcast
· Most tours start + end in the city of Antigua
· Tours required for overnight stays, but sell out weeks in advance in high season
· Tours cost on average $80-120 USD per person - this one is highly rated and recommended
· Group size, campsites, & equipment quality varies
· Altitude adjustment and suitable clothing & kit is essential
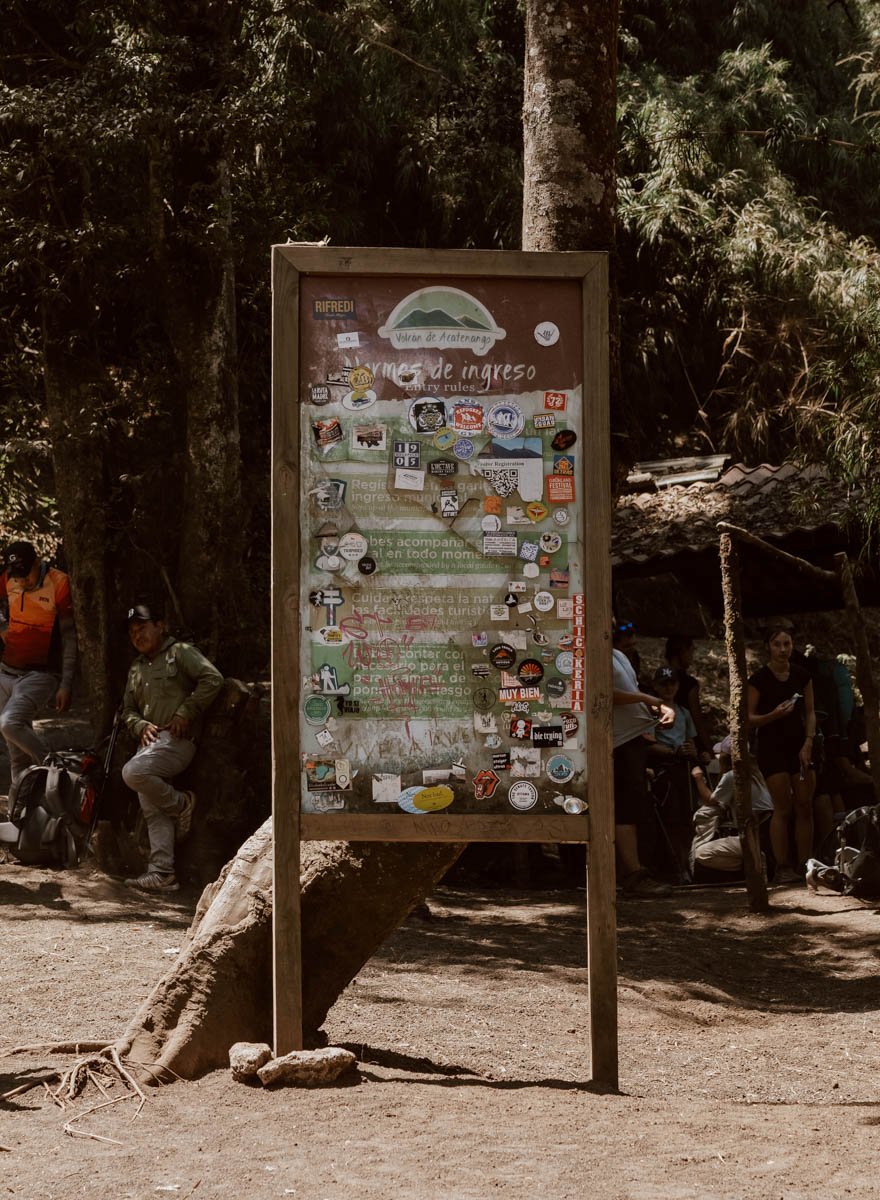
· Trail entry is 50Q per person
· You carry at least 5-7kg on day one
· Volcan Fuego hike is optional, and costs 200Q extra each
· Hiking near and on volcanoes is not a risk-free activity
what does the acatenango overnight hike involve?
It’s perhaps best to start with a quick overview of what this two-day overnight hike is - and what it isn’t.
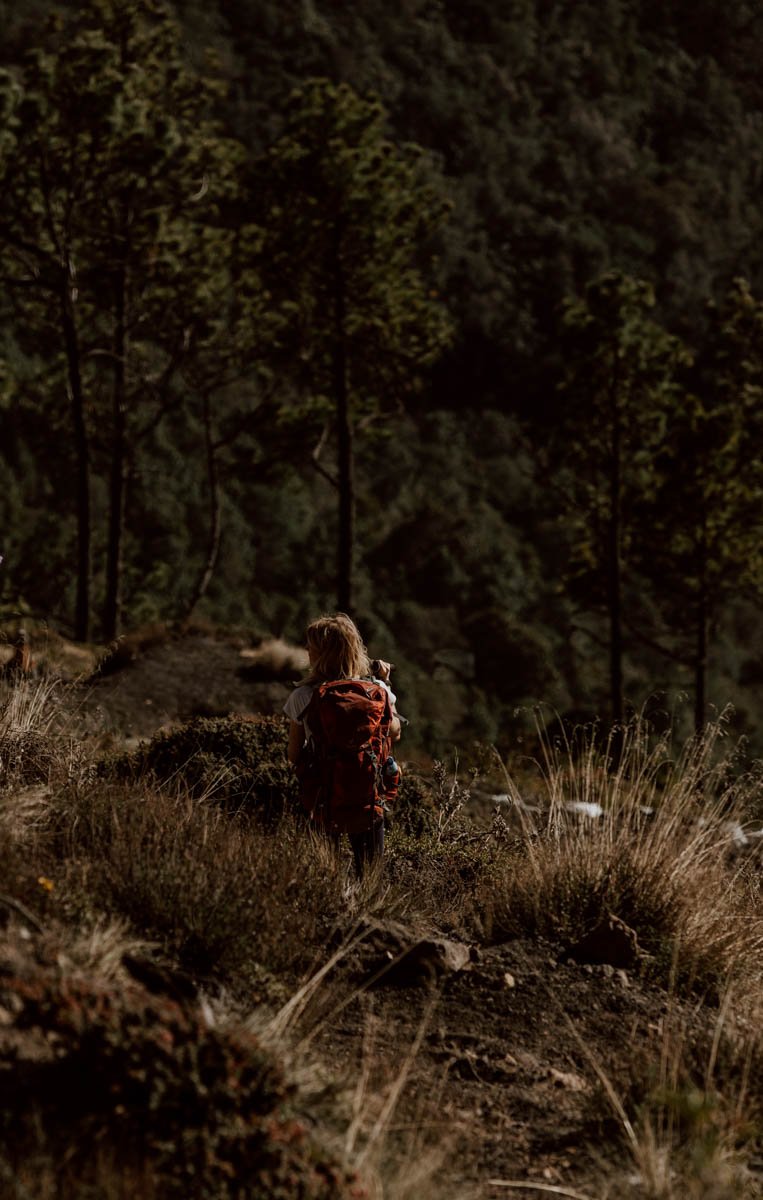
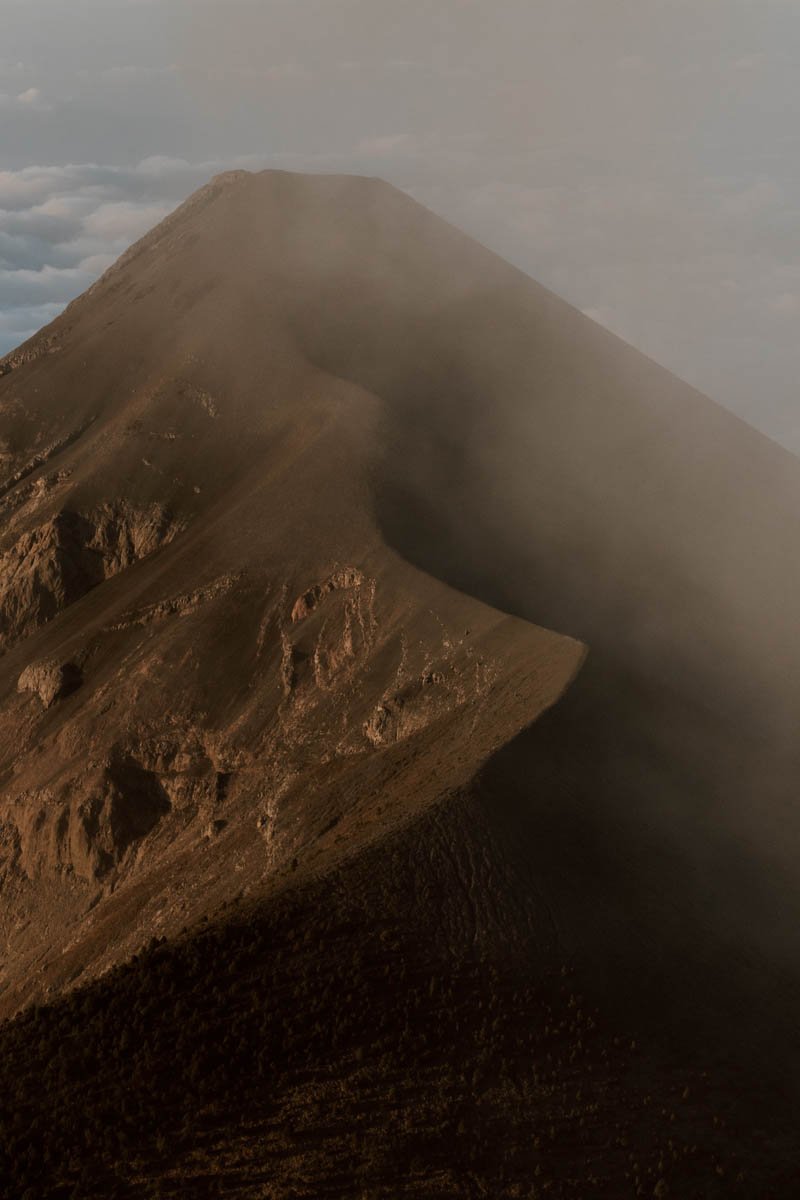
In a nutshell, you’ll drive an hour from Antigua to the start point in El Soledad (Google Maps). From there, it’s a 4.5-5.5 hour / 8km / 5 mile walk up to your tour company’s basecamp near the summit of Acatenango, from which you’ll have stunning views on to Volcan Fuego - the most active volcano in Central America.
Collectively, the twin volcano complex is called ‘La Horqueta’.
Some choose to stay put at basecamp, but you can pay extra to do the additional two-hour out, two-hour back hike to Volcan Fuego (more on this later).
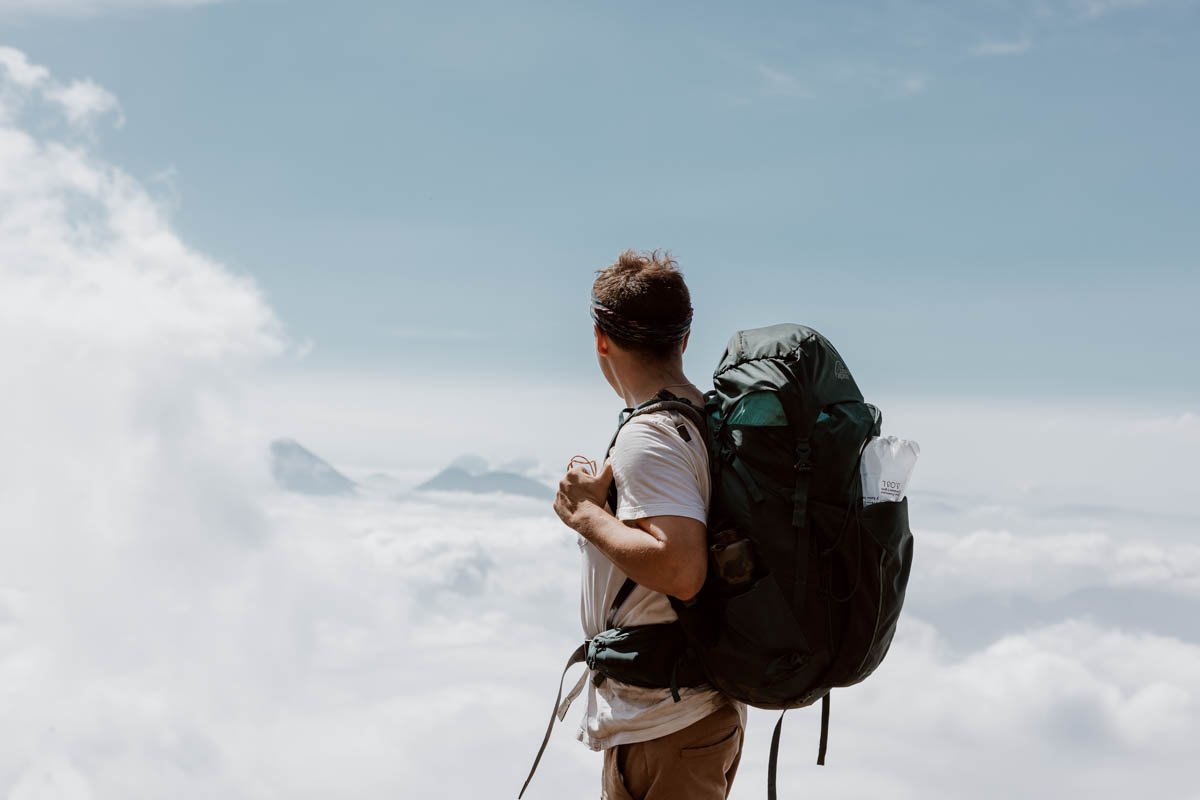
After dinner, the evening is all about hanging out in this out-of-this-world setting: starlight, a sea of clouds, and molten rock and fire spurting out of Fuego.
You’ll then have a few hours’ sleep of varying degrees of warmth + quality, depending on how good your tour’s sleeping bags and cabins/tents are, and just how many people you’re sharing them with!
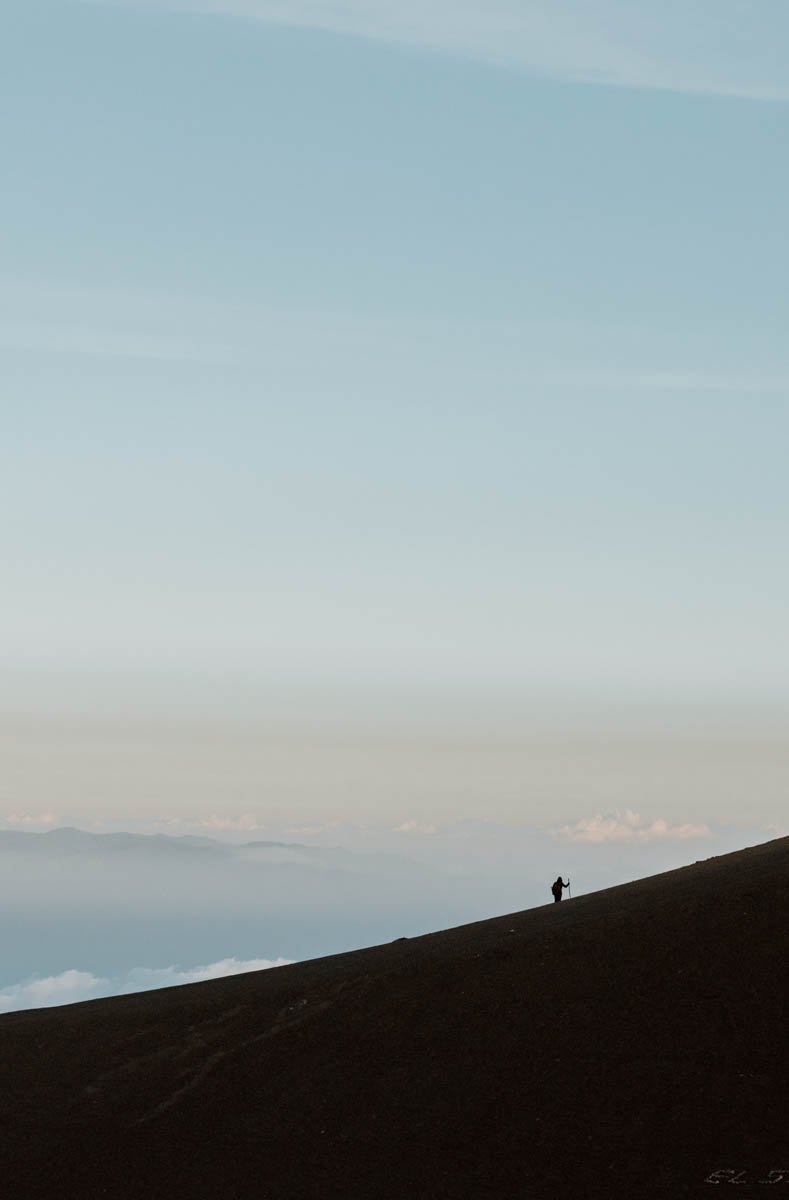
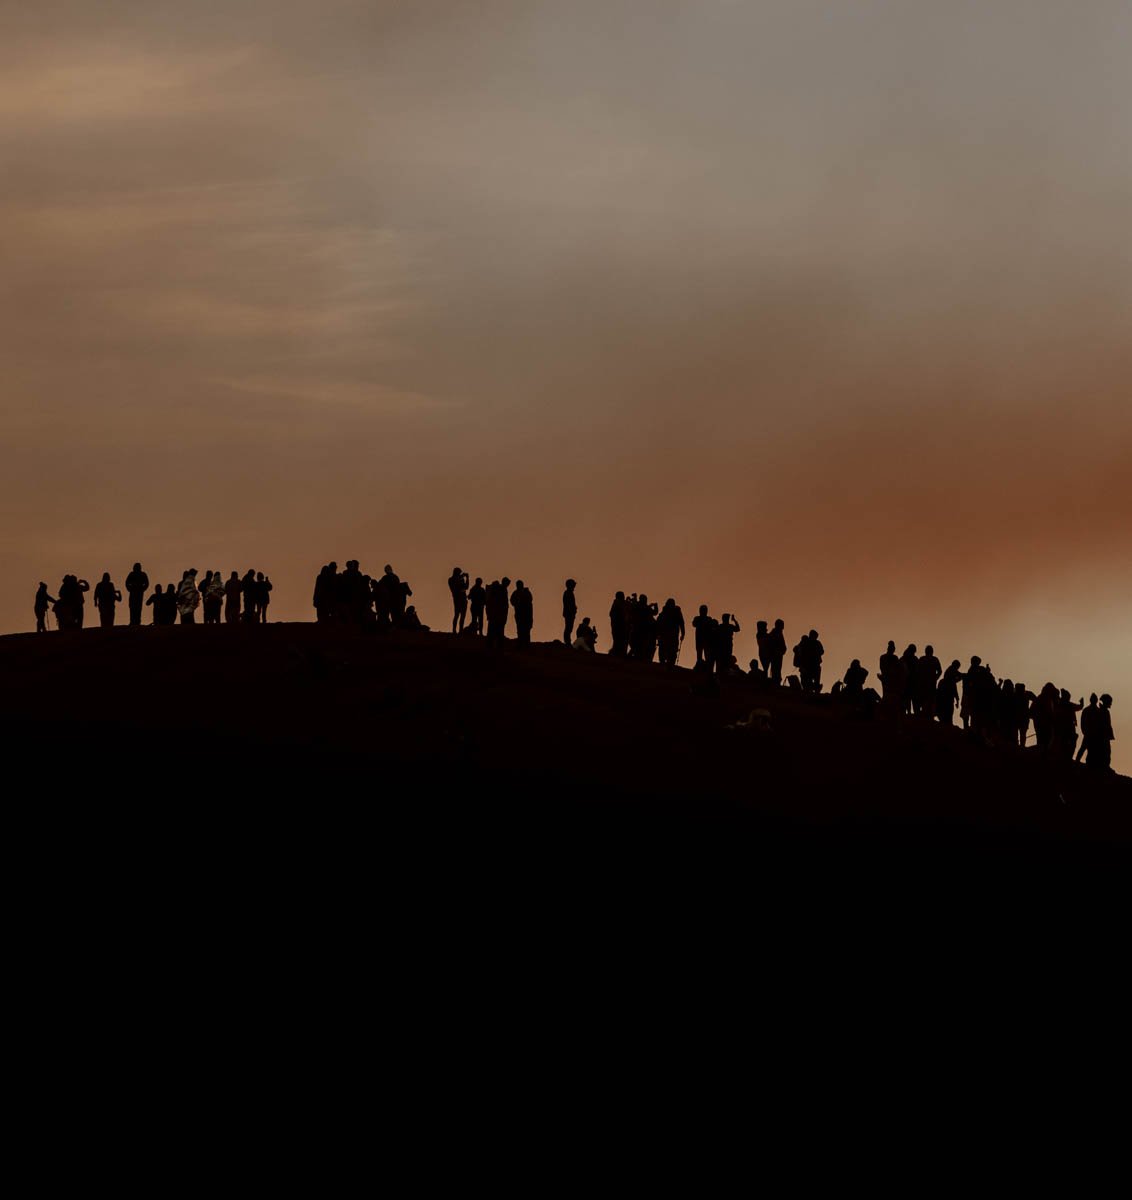
Then, at around 4am, it’s time for the final heart-pounding 30-40 minute walk in the darkness to the summit of Volcan Acatenango for one of the most spectacular sunrises you’ll ever witness.
It’s then either back to camp for breakfast or straight down from the summit for a slippy, sliding descent back to the start point. This is largely along the same route as Day One, and takes 2.5-3.5 hours, with most tours arriving back to Antigua in the early afternoon.
That’s the general route and schedule everyone will follow, and the total distance covered across the two days (excluding the extra Fuego hike) is about 18km / 11miles.
It’s fair to say that the main reason to do the Acatenango hike is to witness the Fuego eruptions up close, which they do, like clockwork; overnight stays permit you to see it burning a fiery glow into the night sky.
So, you’re really hiking up Volcano Acatenango in order to see, and possibly continue hiking on to, another volcano. Also, those sunset views from the summit across several other volcanoes.
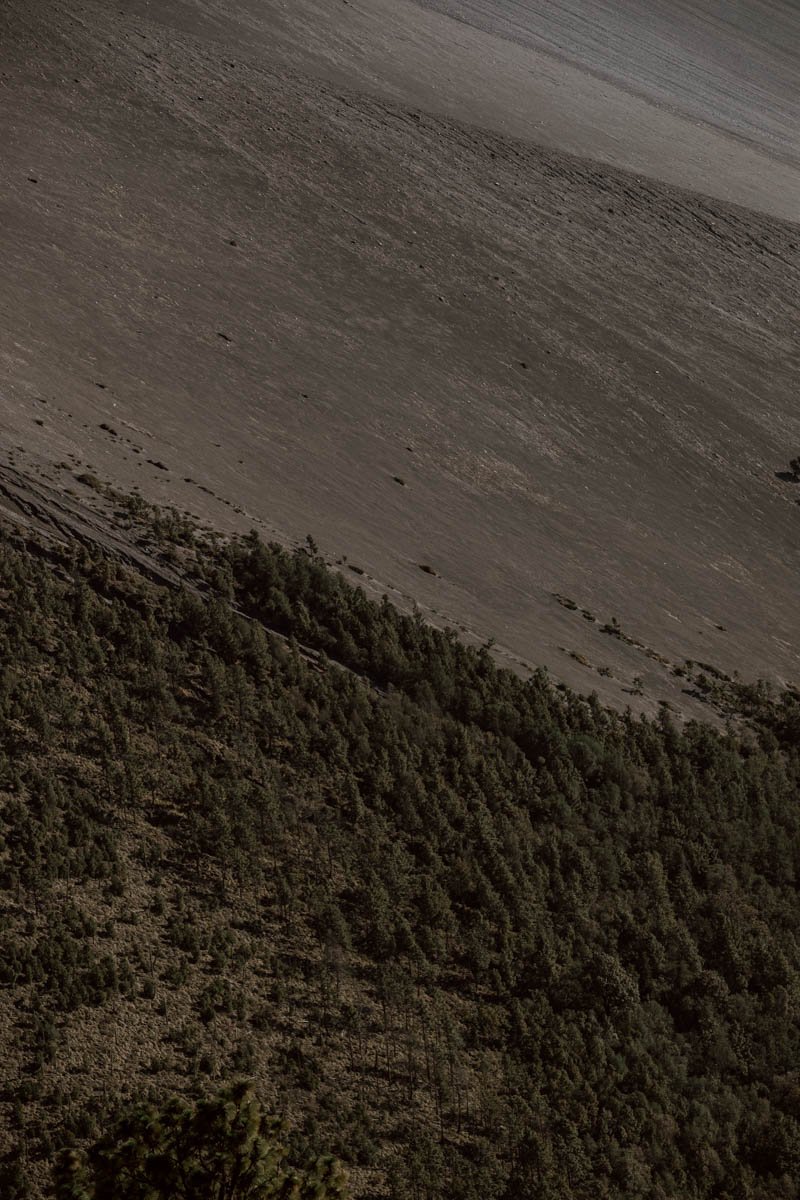
However, the whole experience and setting of camping above the clouds on the side of Acatenango (pronounced ‘ack-a-ten-ango’) is very very special, and there is some lovely scenery throughout the hike too.
You Need To Do THe Overnight Hike With A tour
Contrary to what you may read online, it is totally possible to hike Acatenango on your own.
If you have no plans to stay overnight, then you can simply head here during the day to walk up and see the view of Fuego erupting, before returning to Antigua in the afternoon. This is a popular option with locals who are on the trail for the weekend or exercise, rather than looking for a once-in-a-lifetime experience.
However, the vast majority of travellers will (and should) want to be up there at night in order to witness the fireworks spraying into the darkness: in order to safely and easily do that, you need to join a guided tour.
Now, we are independent travellers & hikers first and foremost, and we’ve done lots of Central American volcanoes without a tour as it’s our preferred approach. If hiking Acatenango during the daytime was our plan, then we’d have found a chicken bus or Uber to the entrance and done our own thing. It would all have been straightforward enough - but getting a ride back to Antigua is something to clarify before heading out.
But, when you need to camp at altitude on a summit facing a highly active volcano, it is 100% safer, more convenient, and more enjoyable to let someone else take on most of the responsibility for your food, kit, warmth, and round-trip transport.
Whilst camping on your own within the crater is still technically possible, it is not at all recommended as most travellers are unlikely to have all the necessary and suitable kit with them (it’s not available to rent in Antigua). However, this goes from a strong ‘recommendation against’ to a very serious safety warning when conditions are bad - six young Guatemalan campers died of hypothermia in 2017 and it is simply not worth the risk.
We’ve covered all our advice on the best tour companies for the Acatenango hike (and one to avoid) later in the post. If you’re in a hurry though, three to check out are:
· Camp AKT | locally owned, small-groups, and a fantastic basecamp - we hiked with them.
· OXO Adventures | a trusted and long-established operator for Acatenango.
· Wicho & Charlie’s | best if you need to borrow lots of good equipment and not on a budget.
The most important points to note when choosing the company are the total group size, quality of basecamp accommodation, meet-up location, English-speaking guides or not, and what clothing + kit is included or charged extra.
Note that you can do this hike throughout the year, but companies do not offer refund for bad weather, poor visibility, or no views of Volcan Fuego from Acatenango. To improve your chances, try to do it in the November to April dry season, but nothing is guaranteed.
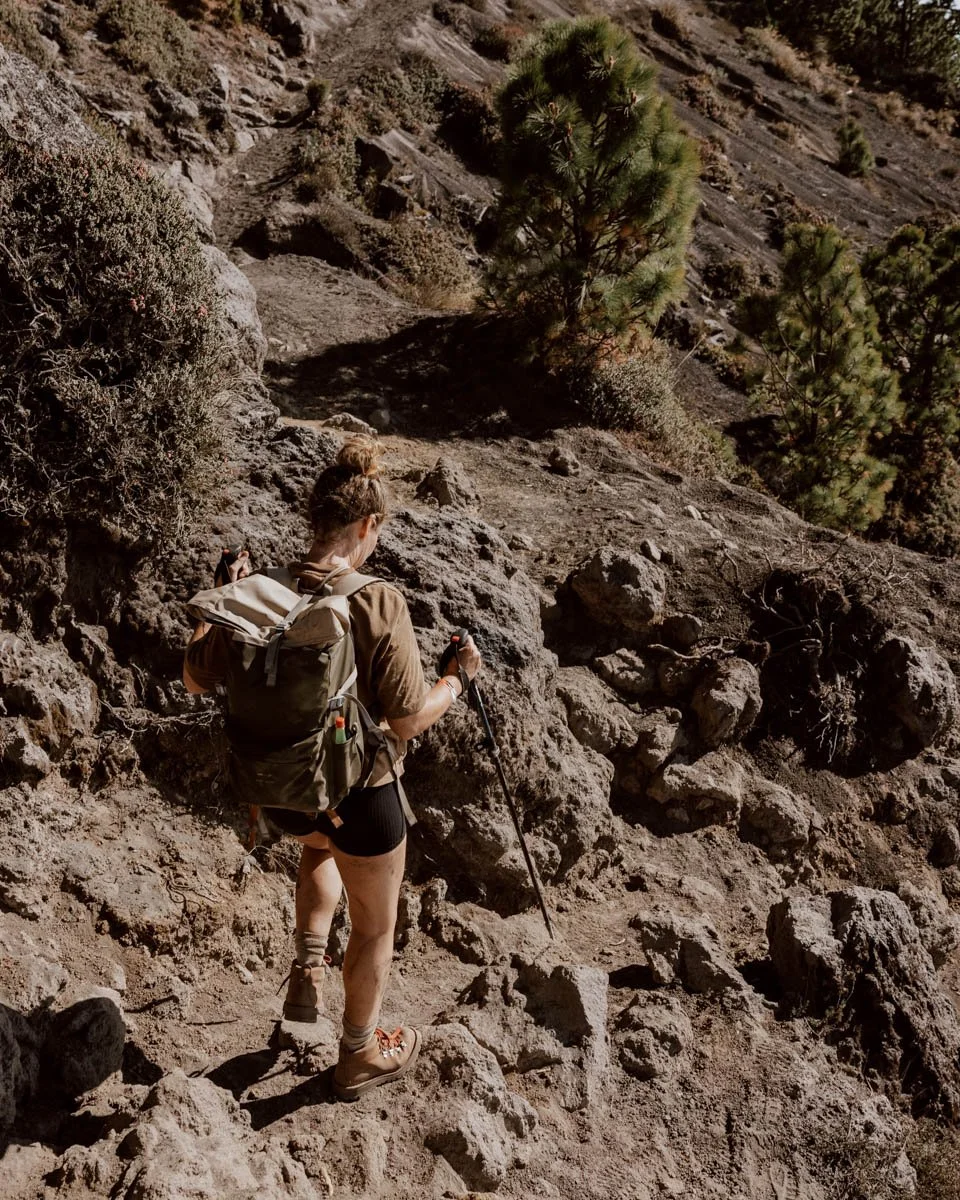
The Hike & Trail Is Not That Difficult…
After hearing a lot of talk about how brutal the Acatenango hike was, we feared the worst.
For reasons of creativity, insurance, and Emily’s paranoia, Andrew has to carry about 12kgs of tech on his back on multi-day hikes before we add in any trivial stuff like food, clothes, and toiletries. On the Inca Trail he actually ended up carrying nearly as much as the porters and, whilst he stoically perseveres, a challenging hike can become brutal with that extra weight on your back.
Spoiler alert: you’ll also have to carry everything you need up on your back.
Thankfully, though not a breezy walk in the park, the reality of Acatenango as a trail and physical challenge wasn’t as menacing as we’d feared and been led to believe by others.
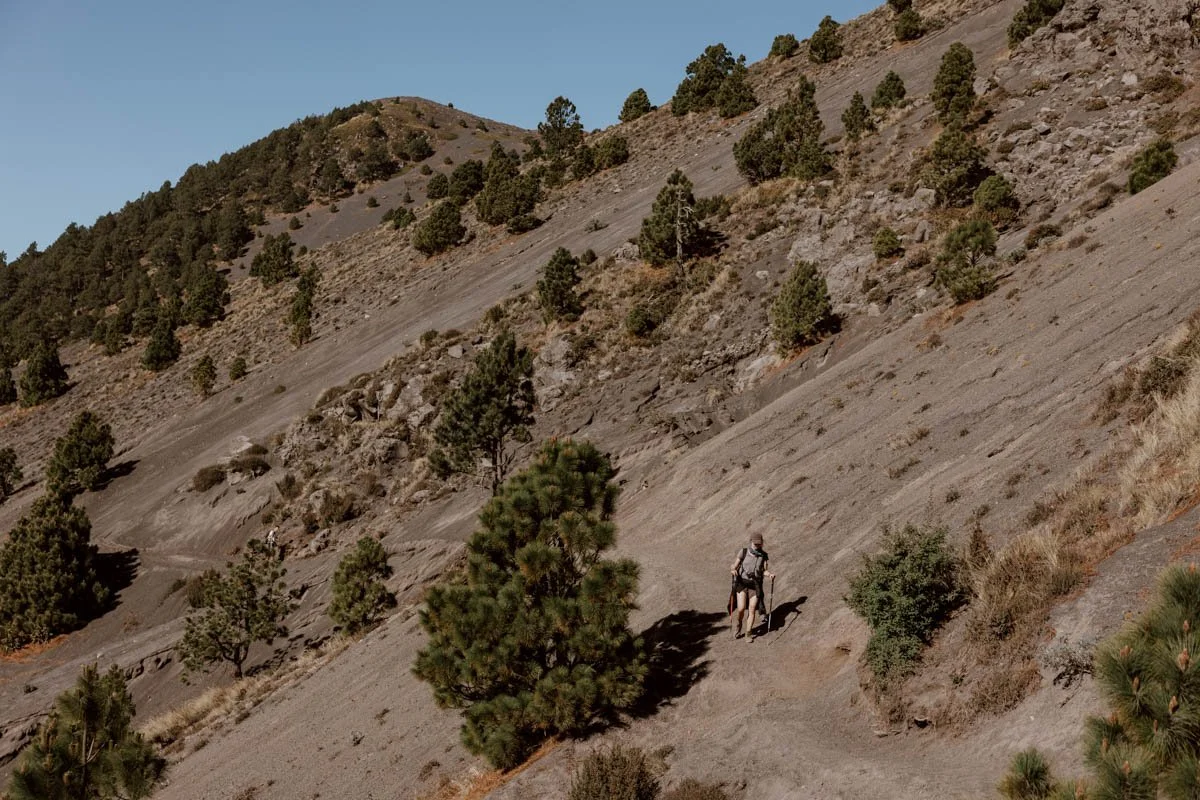
The 8km route up can be roughly split into three sections:
· The Start | A steep river of sand and grit with no shade and a traffic jam of tour groups starting and ending, the kick-off is is actually one of the most challenging parts. After the small restaurant, it’s a narrow gulley of barbed wire on both sides through farmland, and then a steady up with some wooden stairs to reach the ticket office and large rest area.
From the entrance to the ticket office, it’s up to an hour and there’s no point rushing. There are a few places to buy drinks / snacks here, and it’s the last place to do it on the trail.
· The Middle | Basically, this is all up all the way. It’s a gradual incline, rather than a disgustingly steep one, but parts of it will take their toll due to the weight on your back and increasing elevation. Much is in shade thanks to the cloud, pine, and sub-alpine forests providing cover and a fresh feeling in the thinning air, and the trail is mostly compact dirt and dust. There’s also a little bit where you need to scramble up and over some rocks.
Our group took just over three hours to cover it, with regular rest stops and a lunch break, and going at your own steady pace is the best thing you can do. The crowds also thinned out considerably.
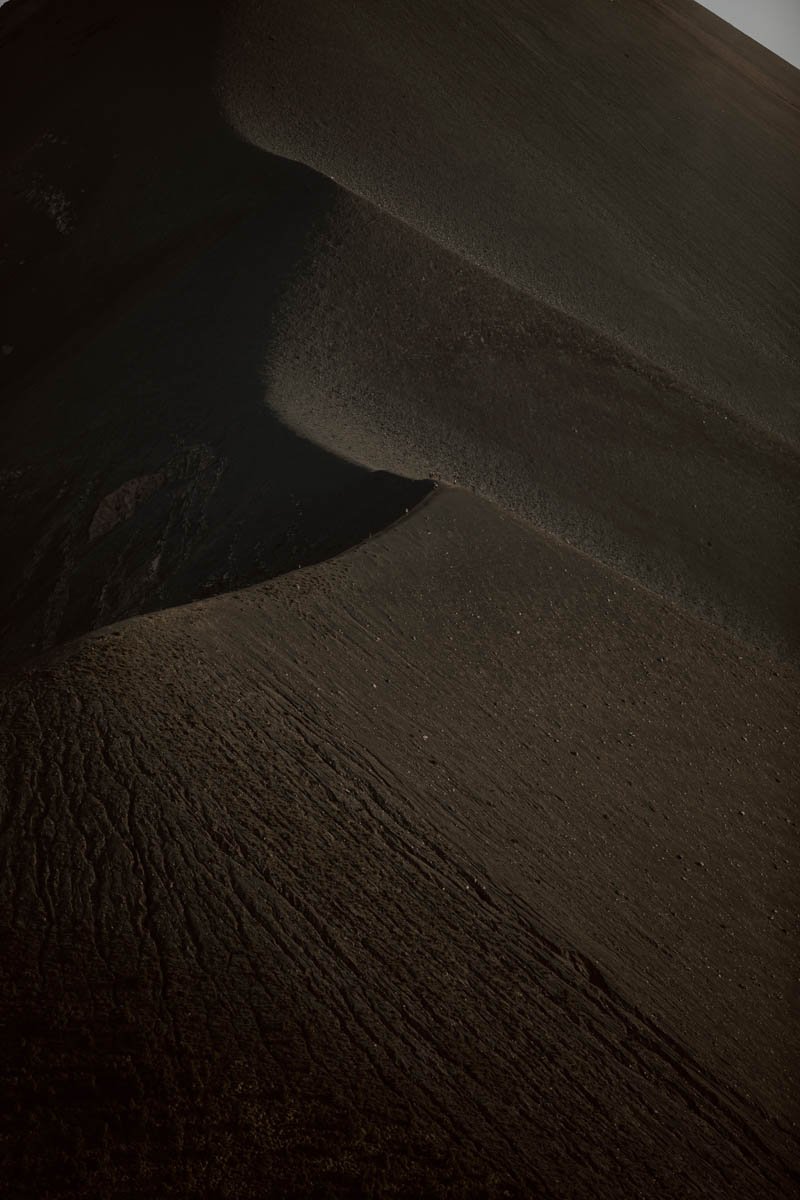
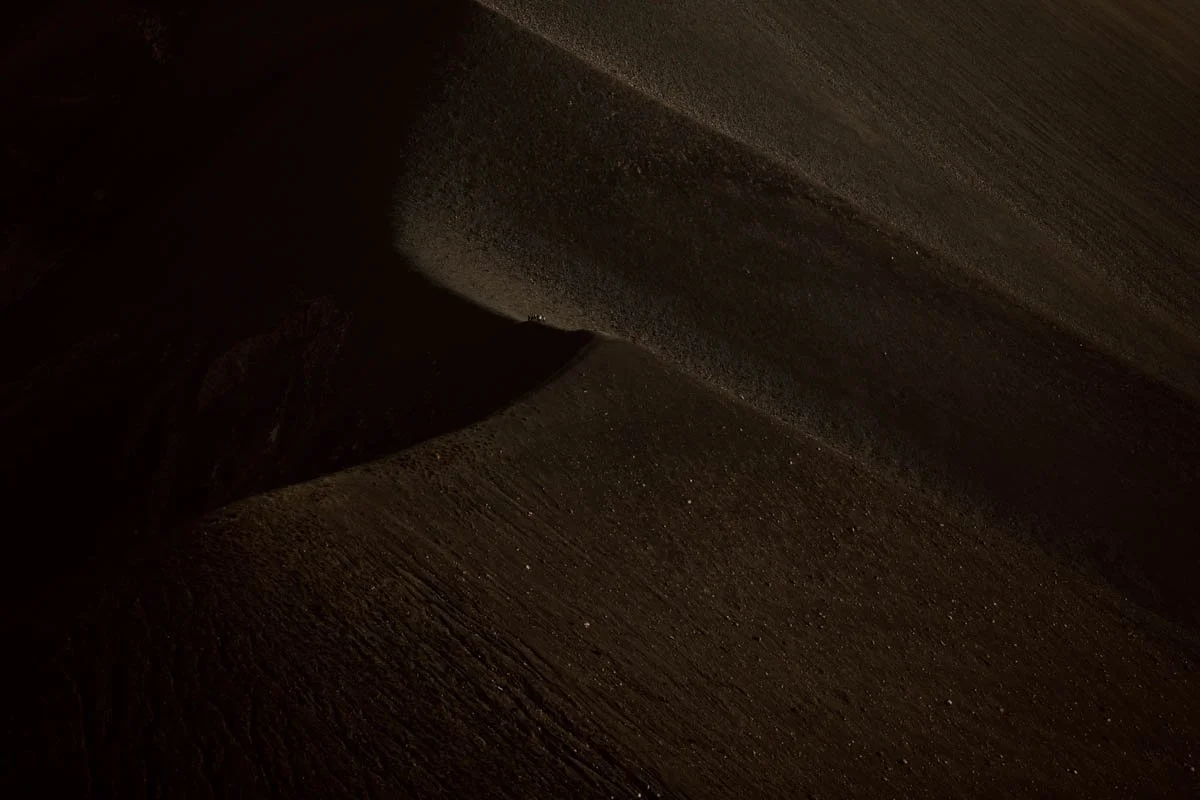
· The End | The final section offers the most exposed and dramatic scenery, and is much flatter than the middle part. The ground changes to a combination of loose and compact grey grit, whilst the trees are much sparser. It only takes 35-45 minutes to cover it, but as the terrain and trail varies so much, it will offer a welcome sign that your hike (or struggle) is nearly over.
Our group started the hike at 12pm and arrived at the camp at 4pm, and then took 3 hours to descend from the summit to the entrance the following day - you can find more details on the route + trail profile here on AllTrails.
Now, we are never going to say ‘x hike is easy’ or ‘you won’t have any issues’ just because we didn’t. It’s always so subjective based on conditions, your relative experience, and physical fitness.
However, if you want some reassurance, we found the trail, the terrain, and the route itself to be very manageable and something to enjoy + endure for the most part, rather than fear. Our guides insisted on rest stops every 20-25 minutes up and down at the checkpoint stations where the were usually benches and shade, and one would always wait behind at the back of the group with slower members.
The Santa Maria Volcano hike outside Xela kicked our arses in comparison.
…But Many Really Will Struggle!
BUT - and this is a very important but - that does not mean it’s going to be easy.
We are experienced hikers with a decent level of fitness, but many who attempt Acatenango will tick one or none of those boxes: this is now one of the most popular things to do in Guatemala and a very popular hike with travellers who do not tend to hike.
Naturally, this means some people will struggle a lot more than others due to the fact it’s their first 1) proper hike 2) volcano route profile or 3) experience of high altitude.
For some, it’s going to be a demanding combination of all three - and you have to lug up all or most of your kit!
All of this can really take your body by surprise and, from what we saw and heard of people’s struggles, injuries, and serious/comedic lack of prep, Acatenango’s reputation for a severe level of difficulty primarily stems from its popularity.
Neither of us are natural-born hikers, and we’ve only come to love it through travel, so we would only encourage people to get out and do it!
However, it is also important to be realistic about your fitness levels, health, and ability to complete both days safely. Also, whilst every group will have a range of abilities and ages, you will be expected to keep to a moderate pace. Although two or three sections of the walk up may not be enjoyable, reaching that view of Fuego from your campsite makes all the pain worth it (and the post-hike glow and sense of achievement is a wonderful feeling to tap into).
So, if you’re reading this at home and your Guatemala adventure is a while away, there really is no better motivation to start moving & improving than the opportunity to enjoy that view of Fuego erupting live and in living colour!
If you’re a travelling family, note that several tour companies set a minimum age of five years old and require you to book a private cabin/tent. We can’t really give an opinion on whether you should attempt this with young kids or not, but we did see at least one family with children on the trail.
Travel Tip // If you are a faster hiker, be understanding and supportive of slower or struggling groups members; this is an experience to remember, not a race to the top.
If you wish to make the hike a little easier, all tour companies offer a paid porter service for 200-300Q. They’ll carry your bags up to the campsite and back down if you want the full service - though the bag will be much lighter for the way down so you may as well carry it.
If you are really struggling on the trail, there are also some horses available to ride up for 700Q one-way, but we only suggest this as an absolute last resort, not something you should depend on or expect to use to hike up the volcano. Most horses and mules can only safely take 60kg, and many tourists weigh much more than this.
If you want to camp overnight but do not feel confident about completing the full hike, or would prefer a less onerous walking experience to get to camp, you can also find a few companies offering a 4x4 Tour to the top, followed by 1.5 hour hike to basecamp.
Adjust Your Altitude & Itinerary Planning
Mentally prepping yourself and pushing through on the trail is key, alongside plenty of rest stops and staying hydrated, but it is important to know the difference between ‘the struggle’ and something more serious.
Altitude sickness is both the great equaliser and destroyer of dreams on hikes, and doesn’t discriminate on age, weight, fitness levels, experience, and race (though men are at greater risk than women).
Symptoms of AMS start at 2,500m, but anything from about 2,000m can cause the associated headaches, fatigue, and vomiting - and you better believe it’s an issue on Acatenango hikes!
Your start point in La Soledad is just under 2,500 metres, and from there it’s a steady ascent to the campsites at 3,600metres. The summit is at a colossal 3,976 metres!
In our small group of ten travellers (some have 40+ people), fortunately only one guy was badly affected, but he managed to complete everything despite the puking. Emily and a few others also got really bad headaches in the evening and on the sunrise walk to the summit, but nothing major. Some people do get hit hard though, and altitude issues can cut plans for the Fuego and sunrise hike off at the knees.
So, what can you do to prevent it or minimise the severity of the symptoms?
Plan your itinerary to allow acclimitisation
Stay well hydrated in the days leading up to the hike, as well as during it
If you are suffering symptoms, don’t keep quiet for too long: share with your group + guide if you are really really struggling. The best thing to do if things worsen is ascend to a lower altitude and rest, but they may also provide altitude sickness tablets*
Planning your Guatemala itinerary so your body is better adjusted to the altitude is the very best thing to do in order minimise the occurrence and severity of the symptoms, and give you a much easier and more pleasant two days on the trail. It’s for this reason that most companies recommend basing yourself in Antigua for at least a couple of days before your hike starts, with the beautiful city being at an adjustment-friendly altitude of 1,545m as well as the main meeting & departure point for the tours.
Due to its proximity to Guatemala City Airport, Antigua is also the likely start point for most standalone Guatemala adventures, and there’s more than enough to keep your entertained there whilst your body adjusts (see our guide).
Lake Atitlan and Quetzaltenango also work, but Antigua makes most sense logistically.
You should absolutely avoid arriving straight from sea-level (i.e. El Paredon or the Mexican coast) or a low-elevation destination. So, if considering saving Acatenango for the backend of your Guatemala itinerary, just ensure you don’t come here straight from the beach!
There are altitude sickness pills on the market, like Acetazolamide, which you can take prior to hikes but we have no experience of using them.
Travel Tip // You should not do the Actenango hike without travel insurance (seriously), but you need to make certain your policy covers this type of multiday hike and this level of altitude. Some standard or cheap policies will exclude anything over 2,000 metres, so you need to either specifically add on coverage or source a policy that covers adventure travel. We buy ours with TrueTraveller.
* The guides have limited to no knowledge of first aid, but they are there primarily there to keep you safe, not just shout ‘vamos chicos’.
Basecamp Is Basic
One of our biggest concerns for this experience was what we’d have to sleep in at the top.
The camps are all situated on the side of Acatenango - some in better locations than others - but they’re literally built on the side of the volcano. Everything has been carried up by man or beast, and your expectations should be lowered now if you’re hoping for regular campsite facilities or any level of luxury.
We’d read lots of reviews of people squeezed into a flimsy tent with six others, some arriving to a hut with no door and a leaky roof, and many suffering through the night in thin, smelly sleeping bags with no blankets and only a yoga mat between them and the soil.
As it’s only for one night, these are all issues that can be tolerated, but your tolerance levels will vary based on your travel style. Of course, it’s all part of the experience and one shouldn’t hike up volcanoes in order to be comfortable, but it does get frightfully cold (5°C–10°C) and quite windy up there and after a long day walking, your body will crave something snuggly and air-tight.
If you want something more comfortable and with better quality equipment, it’s really important to dig into this when choosing your tour. You should also anticipate the loose use of some definitions, varying quality, and for many items to be very well-used.
There are three main types of camp, with some tour companies offering the chance to pay extra to share with fewer people or have a private dwelling, or upgrade to something more like a proper bed.
· Tents | Self-explanatory, they usually sleep 4-6 people.
· Cabins A | These tend to be small A-frame wooden huts with a metal roof - some are very well-made and others falling apart. We thankfully had well-made, new versions with Camp AKT, and it was surprisingly warm, large and comfortable with decent sleeping mats and ample blankets.
· Cabin B | A few companies offer larger wooden and glass structures, which are more deserving of the traditional ‘cabin’ description. Some of these even include bunk beds or double beds with proper mattresses, which really is luxury!
· Glamping | There’s even now a a few tour companies with larger, fancier glamping tents and proper beds for guests.
Note that, these days, the majority of tour companies have all the sleeping gear waiting at the top for you, so you won’t have to carry up any sleeping bags, mats or tents. Unless you pay for a private option or luck out with a smaller group, you will be sharing accommodation with several members of your hiking group.
Travel Tip // The toilets are the worst part of the hike. Camps have their own, whilst there are some at the rest stops on the trail. We have developed a remarkable ability to delay our poos on multi-day treks where toilets ain’t great, but if you need to go, just make sure to hold your nose, close your mouth, and maybe your eyes too. If doing a #1 on the hike up or down, make sure you go off the trail and, if you really need to do a #2, go waaaay off trail and dig a hole (more pleasant than the toilets). Also, bring your own toilet paper.

Acatenango Tours Book Up Fast…
As we found out, many Acatenango overnight tours book out weeks and months in advance.
After this prick cancelled us on the night before we were due to set off, it took seven hours the following day to find a company that had two last-minute spaces available. We really would have gone with anybody at the point, but it was a genuine surprise to learn just how little availability there was in Antigua - even with the companies that hike with 40 or more people in a group!
Coupled with the fact that every traveller we met in Guatemala had done Acatenango even if they were doing no other hiking on the whole trip, meant that we were actually the naive ones.
From all the subsequent frantic research and frustrated conversations with fully-booked up tours, it’s clear that travellers visiting on shorter, standalone trips in dry season should get something booked in for Acatenango once they know their dates and planned their Guatemala itinerary.
If you’re on a slower, longer backpacking trip in Central America, then you obviously will not be in a position to know your dates so far in advance. If you aren’t fussed about who you go with, then you definitely will still be able to find a few last-minute options at various agencies and hostels, and available to book online here, but our advice is to get something sorted out as soon as you know your arrival dates in Antigua.
But, if your heart is set one of the better companies and campsites, then you should be looking to get something booked with them sooner rather than later for your Guatemala trip.
Note that tours booked via the Viator and GetYourGuide websites tend to offer easy cancellation windows if you are uncertain of dates, but want to get something locked in. They are also a good last-minute option if everything else in town and the hostels is booked up.
Thankfully, despite the popularity and the traffic jams at the entrance and first section, we were relieved that the rest of the route was not as cramped or crowded as we expected it to be. The campsites were also well spread out too, and it wasn’t until the summit sunrise and start of descent that it became more congested. According to the guy we spoke to at the ticket office, there’s about 300-500 people hiking on a usual high season day, but this can go up to 1,000 on the busiest weekends and holidays.
…And Not All Tours Are The Same
Ok, we will try to keep this as succinct as possible.
Most Acatenango overnight tour companies follow the same route and stay in roughly the same spot, but they do not offer the same type of experience, care, or quality.
The average upfront cost is in the range of $80-$120 USD per person and will constitute a big chunk of some traveller’s overall budget. But, beyond price and availability, the most important factors to consider or confirm before booking your tour are:
· Group Size | Some companies have 35-45 people, whilst others limit it to around 10 or 15. Those with large groups tend to misleading advertise the ratio of guides to participants rather than the total group size.
· Basecamp | Beyond the type and quality of accommodation, sleeping bags, and thickness of mats, factor in their view of Fuego. Our camp and others had an amazing spot on the west side, but some companies are further to the back or the other side, so have a more limited view.
· Gear | Some have fantastic kit included for their hikers, so you don’t need to bring or borrow much in addition. Others only include limited amounts, and expect you to bring or rent most other items from them. These rentals can add quite a bit to the total cost, so bear it in mind if you’re arriving with very little of the required equipment (see our packing list + advice in the next section).
· Guides | Acatenango is big source of local employment, and it’s positive that nearly all of the guides are from the area. Most will speak very basic English, and their primary job is to safely escort you up, down, and prepare food and the campsite. They are really not there to give you ‘tour guide’ background on Guatemala or volcanoes, and we’ve read various reviews from people surprised / disappointed at this, as well as their limited English. If you require an English-speaking tour guide who will provide more of a service, you need to opt for a more expensive company that specifically offers this.
· Food | All companies will cater to vegetarians, vegans, and dietary preferences, but some will offer better rations, portions, and options than others - not a huge factor when deciding though. Some companies include breakfast in the cost and itinerary, others do not.
· Offices & Lockers | Most companies have their offices in Antigua, and hikers meet there in the morning to leave bags, pack extras, and go through logistics before driving out. A few smaller companies have their offices close to the Acatenango entrance through (like Camp AKT), so you drive out there first.
Companies will usually let you leave stuff at their offices, but not all will provide personal lockers or a locked storage room. If you have valuables, we recommend not leaving them behind unless you are confident in where / how it’s going to be stored. Some hostels also have lockers / storage rooms for guests.
This OX tour - one of our recommended options - offers a pre-meet at 5pm the day before which, if you’re anxious about the hike or need to borrow/rent a lot of kit, wouldn’t be a good thing.
· Start Time & Pick-Up | We think most of the Acatenango hikes start off way too late, meaning you’re hiking at the hottest and sunniest time of day. The reason seems to be so they can sort out logistics between the previous day’s tour ending and the next day’s starting, and turnover basecamp, but some reviews mention that the later start time and / or pick-up delays meant they missed sunset and couldn’t hike Fuego. Note that, though the stated meeting time may be early for some tours, there is usually an hour or so allotted for packing and faffing about afterward and then another hour’s drive to the start.
The company that screwed us over (this tour - but they’re also on GetYourGuide) only did pick-ups, and did not have offices.
· Ownership & Sustainability | Not all companies are locally owned, whilst some have better credentials on sustainability than others.
· Weather | Most companies will run Acatenango tours 365 days a year, and they offer no guarantee of conditions, views, or views. Doing it in the rainy season (May to November) increases the chance of rain and poor visibility, but a company won’t necessarily advertise this or advise you of the likelihood that it’s going to be a washout.

The Best Acatenango Tour Companies
From our own experiences, research, and additional recommendations from our Instagram followers and other travellers we met, you should check out the following Acatenango overnight tour companies:
Camp AKT | Small-group tours, with a maximum of 10 participants. We went with them and had a very positive experience, with an excellent basecamp setting and conditions. They screwed up the sunrise hike timing though, which we’ve given them constructive feedback on, and need to invest in more kit to borrow.
OX | A long-established, professional operator, they have wooden cabins and a pre-trip meeting the day before you set off. We received lots of positive recommendations from our followers, and they also have lots of excellent positive reviews here.
V-Hiking | Several travellers we met as well as followers recommended them.
Lava Trails | They didn’t come up in our research, but several followers said they had a very positive experience with them. Whilst they aren’t locally owned, they appear to have a really good ethos as well.
Wicho & Charlies | They have the best quality equipment available for their groups, and their office is really well set-up too. A very popular option with a good ethos but their prices are higher than most other companies - if you want a slicker, more comfortable experience across the two days it’s definitely one to consider. They offer private cabins as well as shared ones.
Although their sky-high high prices rule will them out for most travellers, Old Town Outfitters is another to consider if you are a traveller who wants better equipment and more of a traditional guided hike experience.
Soy Tours | We had a number of very positive recommendations for Soy Tour, but also one not so good. A locally-owned company with groups sometimes including 30+ people.
CA Travelers | Another popular option with our Instagram followers!
And, if you’re wondering the tour you absolutely should not book based on their awful customer service, it’s this one on Viator (but he’s also on GetYourGuide). The owner cancelled the night before because he thought we were ‘problematic’ for asking him to confirm which pick-up point to meet at the next morning, as his documentation said two conflicting addresses five minutes apart. It is one of the most popular and well-reviewed tours on the website, but his conduct was so unprofessional and bizarre that we have to specifically recommend against booking it. We received a full refund by the way, and have also given feedback to Viator.
Whilst lots of backpackers end up going with Tropicana Hostel, and many we met spoke positively of their experience, do note that they have really large groups of 40+ people and we wouldn’t personally go with them. They do offer complimentary storage + showers though!
If you can’t secure a place with your preferred tour company, most offer a reservation list you can sign up for.
Travel Tip // It is important for certain travellers to be realistic that this is a hike up a volcano in Guatemala, and some facilities may not match with the price paid or marketing. That’s why we suggest any travellers who really want to a more ‘guided’ and ‘looked after’ experience set their expectations accordingly, but also do their research into the tour company and read reviews.
You can also find several highly-rated options to book here and also available on Viator.
You Can Borrow Lots of Gear & Clothing…
It gets really cold up at the top and overnight.
This is wonderfully abated by campfires, roasting marshmallows, and if a Danish person has the foresight to bring up soul-warming rum to add to everyone’s hot chocolate.
Bringing ample layers, a warm jacket, and a hat is essential but - understandably - lots of travellers won’t have all these packed if hiking isn’t at the core of your Guatemala itinerary.
Thankfully, most of the Acatenango tour companies offer the chance to borrow or rent cold weather clothing as well as head torches, walking poles, and backpacks.
However, there’s a big variance on what is included as standard and how much is offered or charged in addition, as well as the quality / sizing / cleanliness of everything. Availability also isn’t guaranteed for everything and everyone in the group. Certain tour companies charge more but have much better equipment included, whilst others may offer a misleadingly cheap price and charge for rental of most items - it’s important to factor this in when researching and choosing your operator.
Travel Tip // The majority of weight in your pack is going to come from water. We were advised to take 3L per person, but the rest of our group agreed that 4L really would have been better. There were no areas to fill up water filter bottles, and we were nearly out of water by the end of our first day. A minority of tour companies include water in your price and some will carry it up for you too, but most require you to buy + carry it. Remember, a litre weighs a kilo!

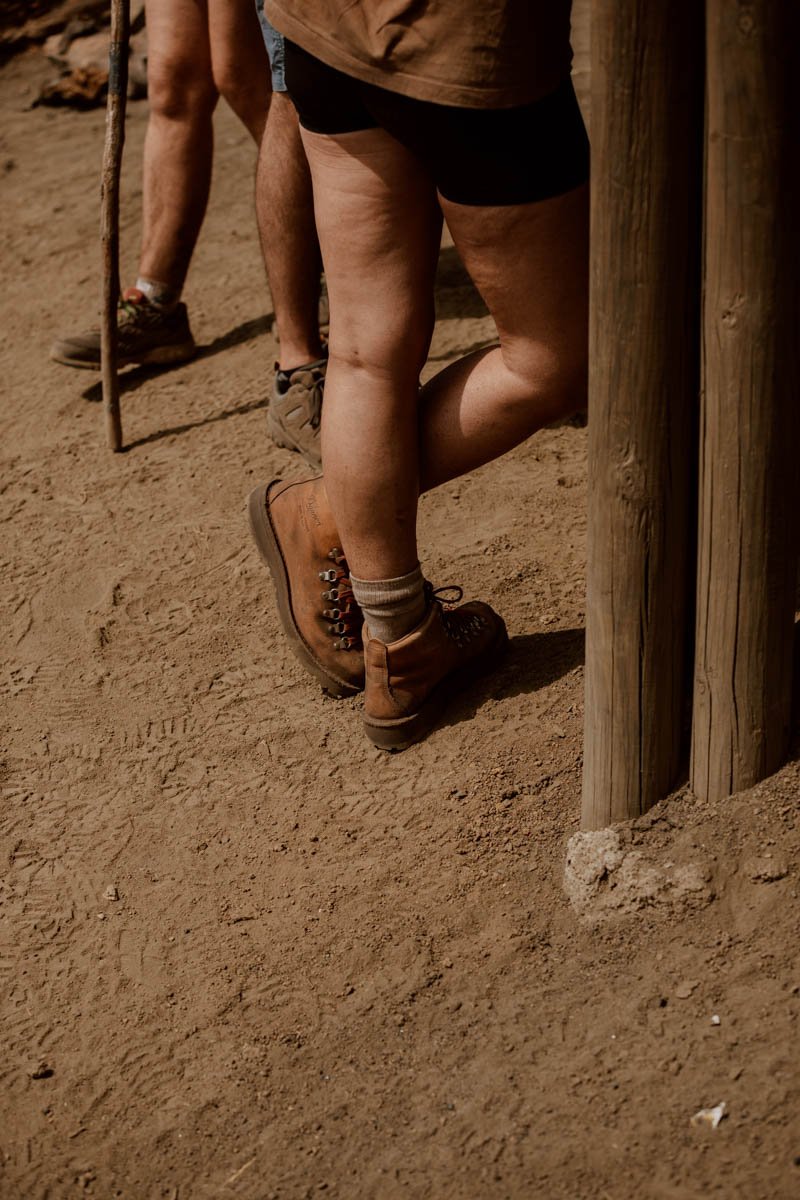
…But You Should Bring Your Own Boots & Backpack
Some companies also offer the chance to rent or borrow hiking boots, but we absolutely do not recommend ever hiking in someone else’s shoes.
You’re not guaranteed to get boots that are comfortable or a good fit, and it’s a surefire way to increase the chance of blisters popping up early on the hike up. Whilst we saw a lot of people in sports or casual trainers, these are not suitable for the slippy volcanic terrain and, though you will be able to hike Acatenango in them, it will ruin your favourite pair and increase chance of tumbles on the descent.
Under no circumstances should you wear sandals.
We always say that if you’re travelling Central America, you better bring hiking boots/shoes to do it right, and there are several other short and long hikes you’ll be able to use them for around Antigua, Lake Atitlan, and Quetzaltenango. So, if you have them at home, bring ‘em with you - just wear them on the plane if concerned about weight/space and tie them on your backpack when moving around the country!
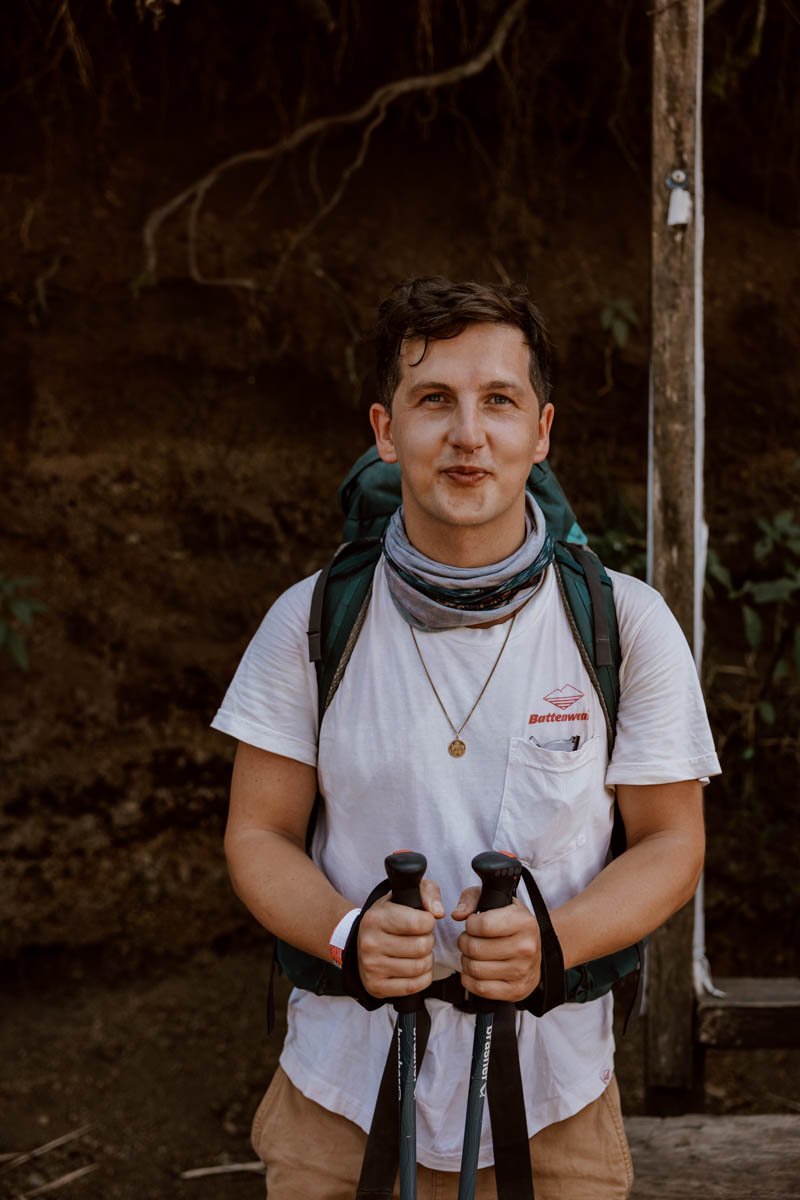
Another item that we think is essential to bring for Acatenango is a decent backpack. Again, most tour companies offer these, but the quality can be really poor and limited (Camp AKT only had three available for our group, and they all absolutely stank). Even the most minimalist of packers will be carrying a minimum of 6kg on the first day, whilst that’s not a huge amount, all bag weight should be on your hips, not your shoulders, and a well-fitted backpack will make a difference in alleviating tension and weight on the climb. Due to luggage storage issues, Emily hiked up with a bog standard daypack where all weight was through the shoulders, which was really stupid and entirely inappropriate for this hike.
If you’re travelling Guatemala with a suitcase or want to leave your own backpack in Antigua, even borrowing a proper backpack that smells of someone’s armpit and is missing a buckle or zip would be a better option than that.
Whatever you wear on your feet, remember that fatigue and slippy terrain combine on the descent, and that’s the most likely place you’ll have a serious injury. We saw all manner of comedic stumbles but also a couple of serious falls on the way down primarily due to the lack of technique, experience, and suitable footwear, with others literally having to be handheld and supported by a guide.
At the end of the post, we’ve shared our recommended packing list so you know exactly what to bring, what to borrow, and what to leave behind in Antigua or the tour company’s offices!
The Hike Beyond To Volcan Fuego Is Optional
We fully intended to do ‘the hike beyond’ to Fuego from the top of Acatenango on Day One.
However, when we got to basecamp at about 4pm and saw that first eruption, we quickly decided that we were more than happy with enjoying that spectacular view from a (safer) distance. When you speak to other travellers before embarking on your Acatenango adventure, some will make it seem that the only reason to do the hike order to carry on to Fuego, but we can categorically tell you that watching the eruptions from a well-positioned basecamp above the clouds is such an incredible experience that you don’t have to tag the extra four hours on.
We also weren’t in the right mental space to do another four hours of hiking, where at least half of it is in the dark.
Do we regret that? Slightly.
There’s no denying that standing on Fuego’s ridge as it erupts above you at a bafflingly close distance, would be an amazing experience.
So, as we can’t share a personal experience of hiking to Fuego, we want to arm you with the necessary context and things we heard from other hikers before/after to help you make the best decision for your own hike:
· The cost to hike Fuego is in addition and paid in cash to your guides - it’s usually 200-250Q per person if they get the required number of hikers from your group (usually a minimum of 4). Some will still go if you don’t have enough people, but it’s not guaranteed and the price may go up. If you are really pumped for Fuego, we suggest going with a larger group to increase the chances and keep costs down.
· The hike is illegal and setting out is always at the discretion of the guides. You should never go on your own, it is in no way risk-free and, from what we saw, you stand waaaay closer to the eruptions than you may reasonably expect. In 2018, Fuego had its most serious eruption, with the ash plume reaching up to 10km and at least 69 people killed from the pyroclastic flow.
· It’s about two hours out, two hours back, and supposedly quite demanding - see the route information here on AllTrails.
· You set off from basecamp quite soon after arrival, and the first section is usually undertaken during the fading light before sunset. Once you reach Fuego, it’s likely already or quickly becoming dark, and the return to basecamp is done in the darkness with a head torch.
· We saw groups out on the S-curve as late as 8pm, and as early as 4am.
· Anyone who does Fuego in the right conditions raves about it, understandably. However, we also met people who hiked in the cloud, didn’t see a thing and therefore found the hike to be a complete waste of time.
· Others we spoke to enjoyed it a lot, but found it to be much more exhausting and scary than they expected. The majority also ended up missing sunrise at summit because they were so exhausted from the previous day’s hiking.
· As with Acatenango, the price is the same, and no refunds given, whether or not you get a view or have bad weather.
· Tour rations are not configured for the hike beyond, so you need to bring more snacks and water.
We should also mention that, if you would really like to do Acatenango and Fuego, but are concerned about doing it in a single day, there are some companies that offer the option of a ‘double header’ two-night tour.
Acatenango Packing List
Right, we promise we’re almost finished.
We hiked in March with clear skies and good weather but, if you are really considering doing it in the rainy season (April-November), you need to bring more thermals/layers and expect rain.
Whichever season you hike in, you’ll require warmer layers to start the hike days in, and to stay cosy at basecamp after sunset. You may wish to start off in these and shed them as things heat up on the trail, but cold conditions at night are a given, so bring what you need in case your tour equipment (sleeping bags and blankets and mat) is not fit for purpose. Remember, it’s always better to be too warm and remove a layer, than too cold with nothing else to put on.
In total, you’ll be carrying at least 6-7kg on day one, and quite a bit less on day two (as you use up all your water). You need to strike the balance between keeping weight down to avoid the walk becoming an unenjoyable activity, but also ensuring you have enough of the essentials for the conditions.
If you are really concerned about this day one weight, we suggest you choose a tour company which carries more communal items for you and/or consider the porter service.
Note that, for Fuego, you will leave most of this at basecamp before setting out and should bring more snacks and water to cover the extra hiking energy.
To speed things up on the morning of the hike, it’s best to have this all bought, borrowed, sorted and decanted the night before, and remember that you need to leave enough space for the food that the company gives you to carry up.
The Essential Kit
· A decent backpack, ideally around 45L. These can be borrowed or hired if you don’t have one
· A puffy jacket. We brought our Finisterre ones, but most borrow or hire
· Hiking boots or hiking shoes, plus at least two pairs of hiking socks
· A fleece or jumper
· Two base layer t-shirts or vests to hike in each day
· Sunglasses
· A warm beanie and gloves. These can be borrowed or hired
· A pair of shorts to hike in when its hot, and a pair of hiking trousers to switch to when it’s cold (you can also sleep in these)
· Headtorch - we’ve used these Petzl ones for years but you can also borrow or hire.
· 4 litres of water. As mentioned, we only took 3L each in dry season, and would have preferred that extra litre. If you’re concerned about the weight of carrying 3-4L, we suggest making use of the shops and sellers on section one, and packing rehydrations tabs. (We usually hike with our fantastic travel filter water bottles but these can be left back at the hostel as there are no water sources to fill up from on the trail).
· Toilet paper - always dispose to it responsibly
· Suncream, plus a personal first aid kit (at least paracetamol, blister care, and hand sanitiser)
· Snacks and sweets - these are essential for an energy boost
· Cash for the 50Q entry, additional Fuego hike, and snacks/drinks along the way
· Biodegradable wipes - there’s no water at camp for cleaning off all the ash, dust, and black bogies, and you don’t want to waste your drinking water. We kept ours to get rid of them in Antigua but, if leaving them on the volcano, please dispose of them responsibly and out of sight.
The Optional Kit
· Hiking poles - we had our collapsible travel hiking poles, whilst most members of our group used the wooden ones offered by the tour. We found them very useful, particularly on the descent. If not included by your tour company, they’re available for rent for 10-20Q.
· A buff. On many sections, this trail is dusty - particularly at the beginning and on the descent - and Andrew wore his Buff over his face way more than he usually does.
· Rehydration tabs or sachets - these are an essential item to travel with anyway, but when you are limited in how much water you can carry up, they allow you to stay better hydrated.
· Sandals. Some people brought a pair to change into at camp.
· Thermal layers. We had these with us, and they’re a godsend at night if you tend to get cold.
· Raincoat. We took ours but only used them at the summit - during rainy season they’d be essential.
· Sleeping bag liner - some travellers really get the ick when thinking about how unclean the sleeping bags are inside, but you’ll be fine. If you do want something more ‘personal’ you could bring a liner.
· Battery pack. This was an essential for us, but several in our group didn’t use require one.
Try Not To Book A Shuttle
Our original plan was to leave most of our stuff in Antigua whilst we were on Acatenango, then have a chilled out day back there after the hike before moving on. The last-minute cancellation meant our plans changed, and we needed a quick turnaround on day two of the hike so we could catch the last shuttle of the day from Antigua to El Paredon at 2pm.
Most tours say they’ll get you back to the city by 12pm or 1pm, so we weren’t entirely confident we’d make it.
Thankfully, we arrived back Antigua by midday, so we could grab our stuff and have a much-needed beer, but it was a bit squeaky bum and meant we didn’t have time to shower or change.
Not a big deal, and it all worked out, but we’d suggest that the best option to avoid stress on day two, missing shuttles, and changing plans (the last thing you’ll want to do after a poor night’s sleep and lots of physical exertion) is to avoid having any fixed travel plans on day two of the hike.
Instead, just give yourself the night back in Antigua after Acatenango.