
Updated January 2021
The hike to Laguna Chururp, a short day trip from Huaraz, was one of our favourites. In this guide you’ll find all the information on how to get there (including why you absolutely don’t need a tour), the hike itself, what to pack and some helpful tips from us.
On the face of it, the day hike to Laguna Churup from Huaraz is fairly easy.
A simple 45 minute colectivo to an easily identified trail head, two hours up, an hour and half down, and back just in time to meet the same colectivo to take you back to Huaraz.
Throw in an altitude of 4,600m, a trail that quickly becomes a small waterfall during the rainy season (not to mention the actual waterfall that you need to jump over), a route that requires you to haul yourself up a sheer rock face with nothing but a slippery rubber covered rope to hold on to, and a path that is frequently more small boulders or thick mud than pleasant dusty by-way and, well, this day can turn into quite an adventure!
However, do not let that any of that put you off Laguna Churup, because it’s all these elements which combined to make this our second most enjoyable one-day hike in Peru (yep, we think it’s better than Laguna 69). Short and sweet with more interesting sections than simply walking on a single trail for hours on end, if you’re looking for something to ease you into one of the longer hikes in the Huaraz area or just a great, accessible day hike, then you absolutely must get your butt to Laguna Churup.
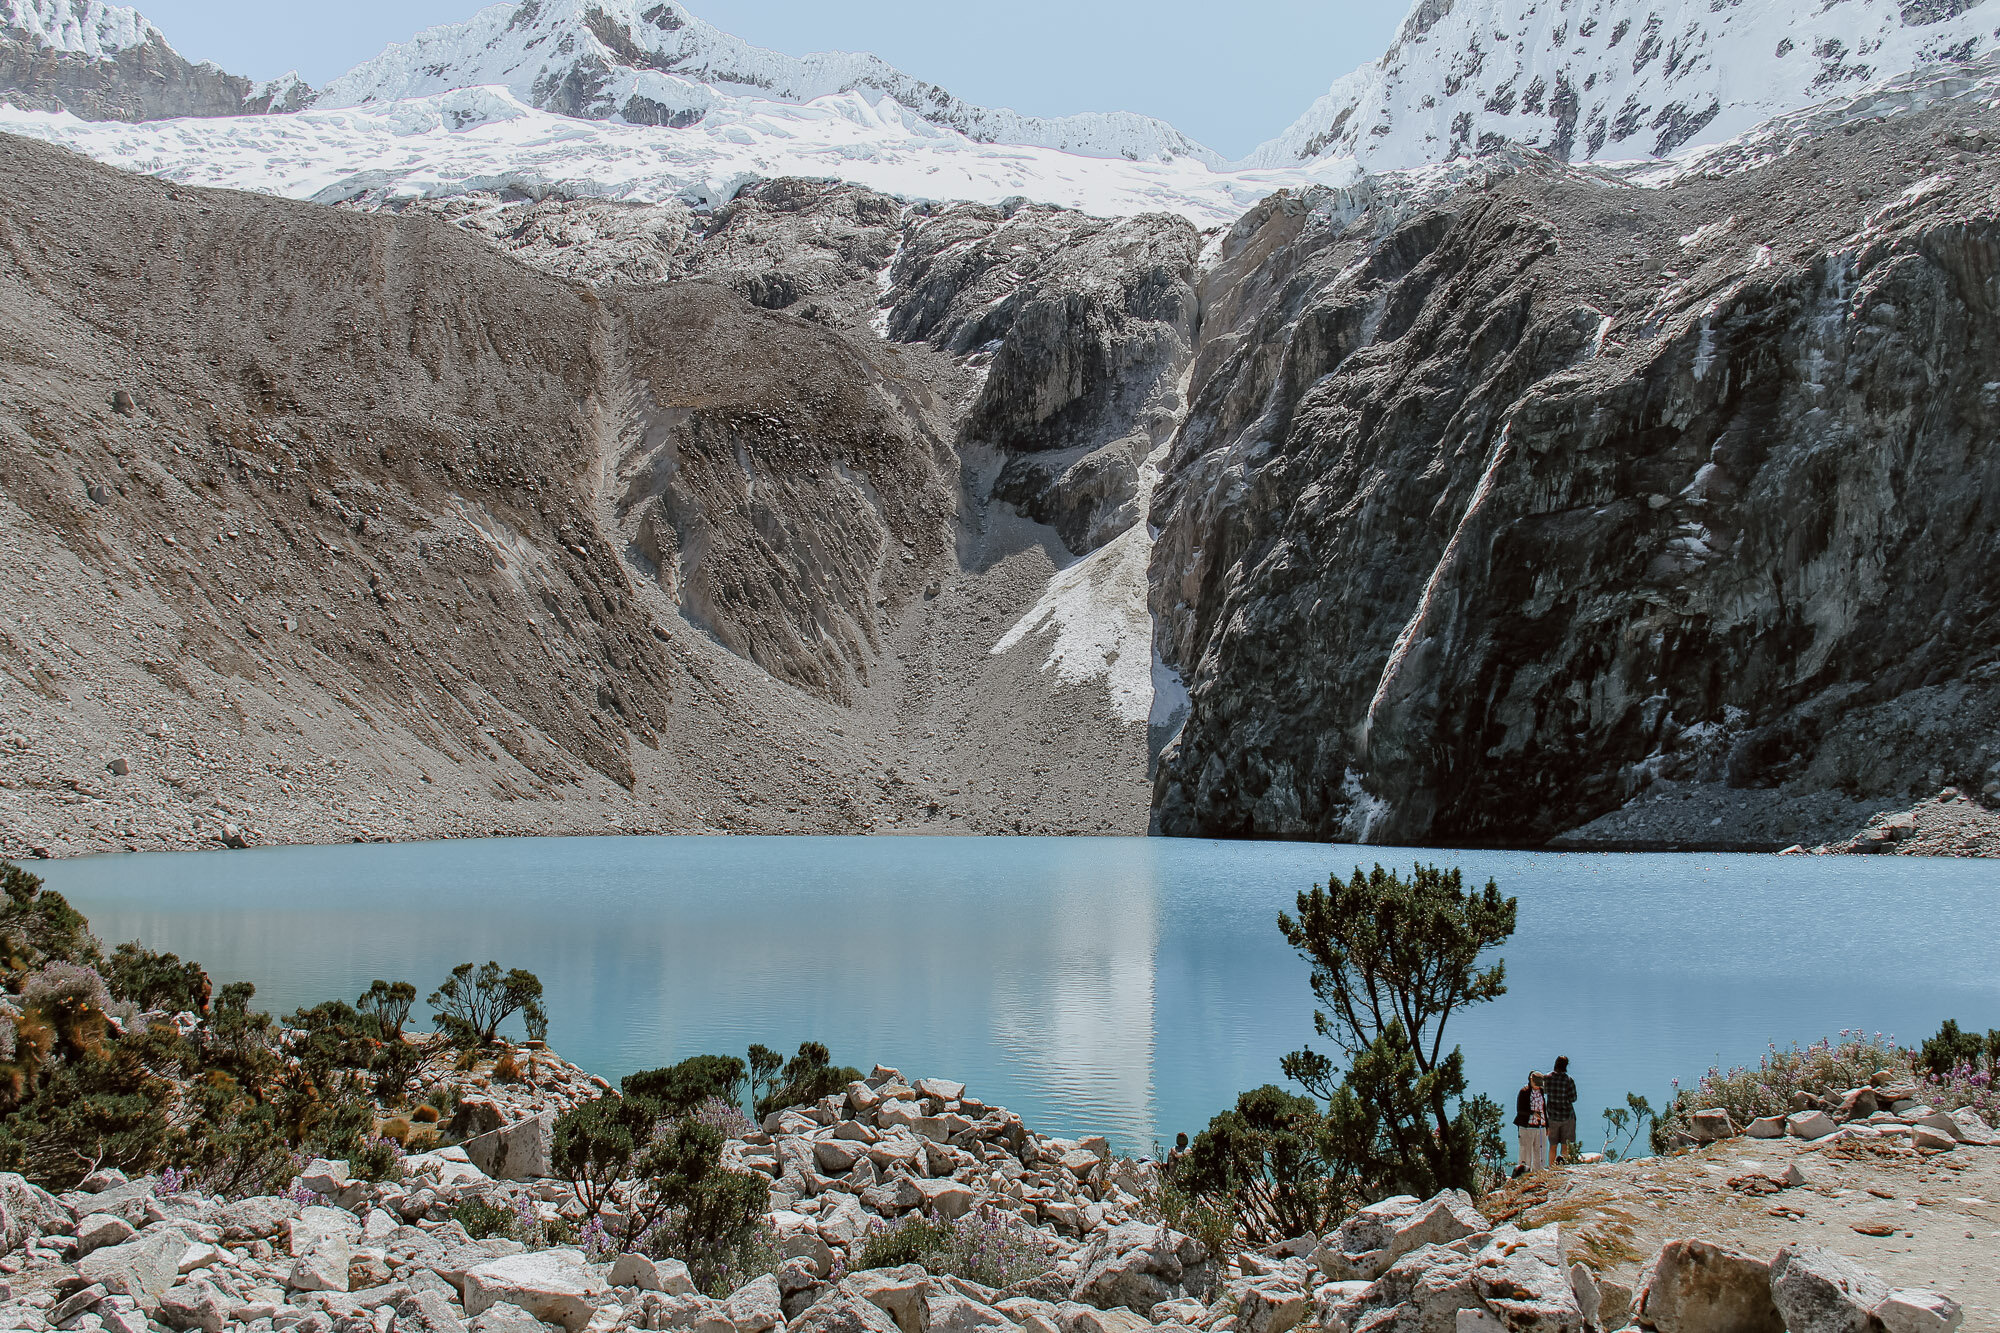
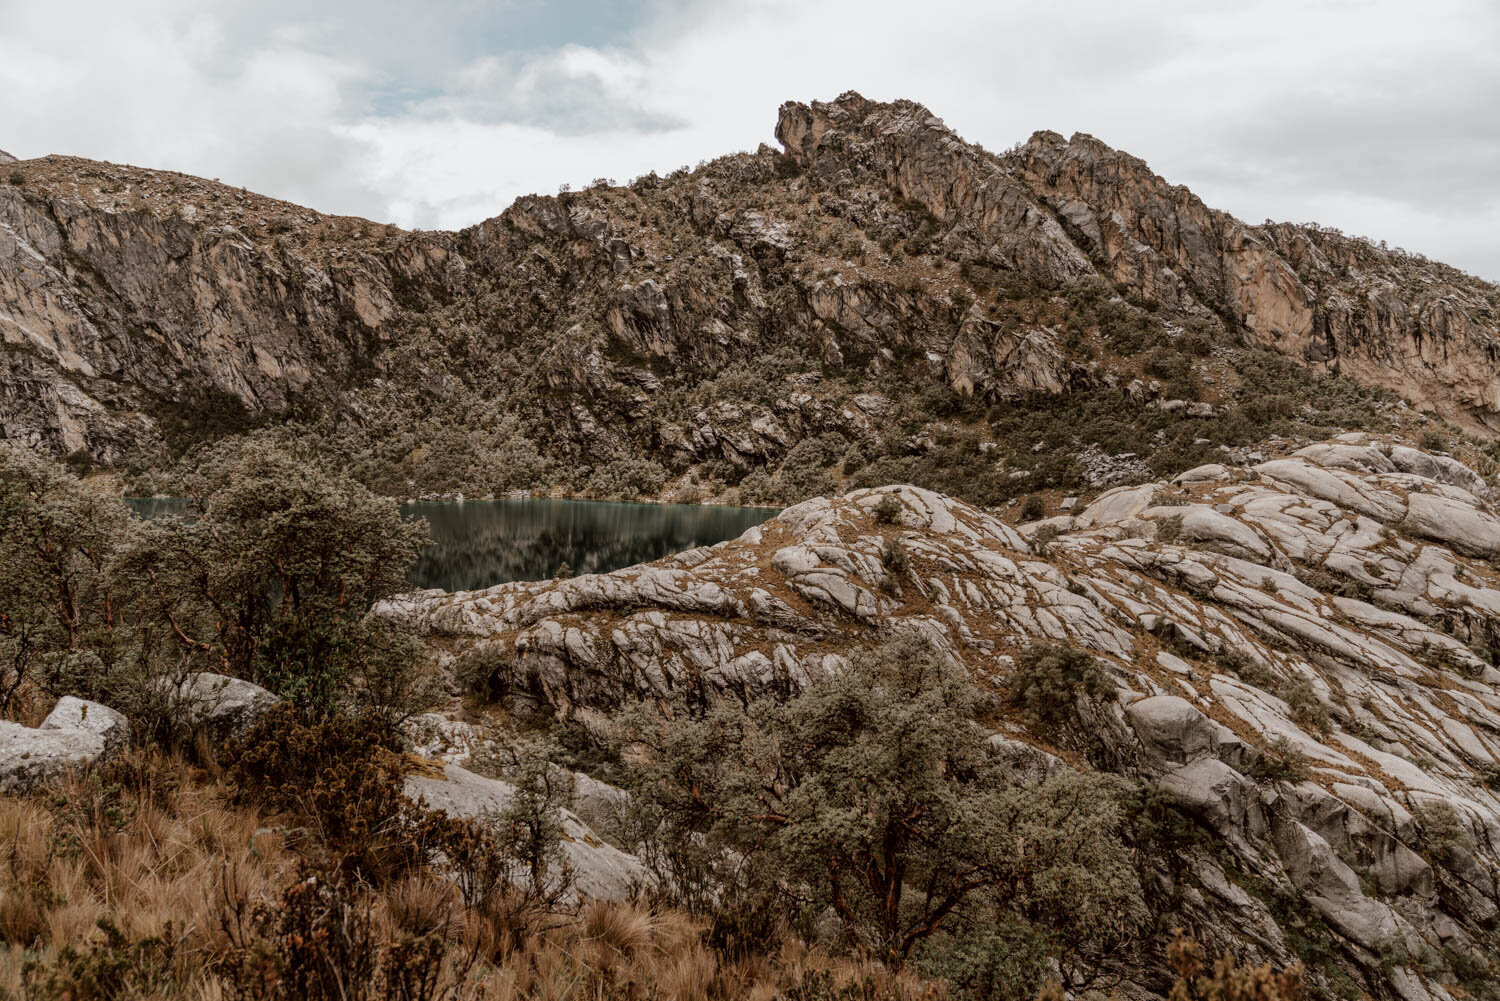
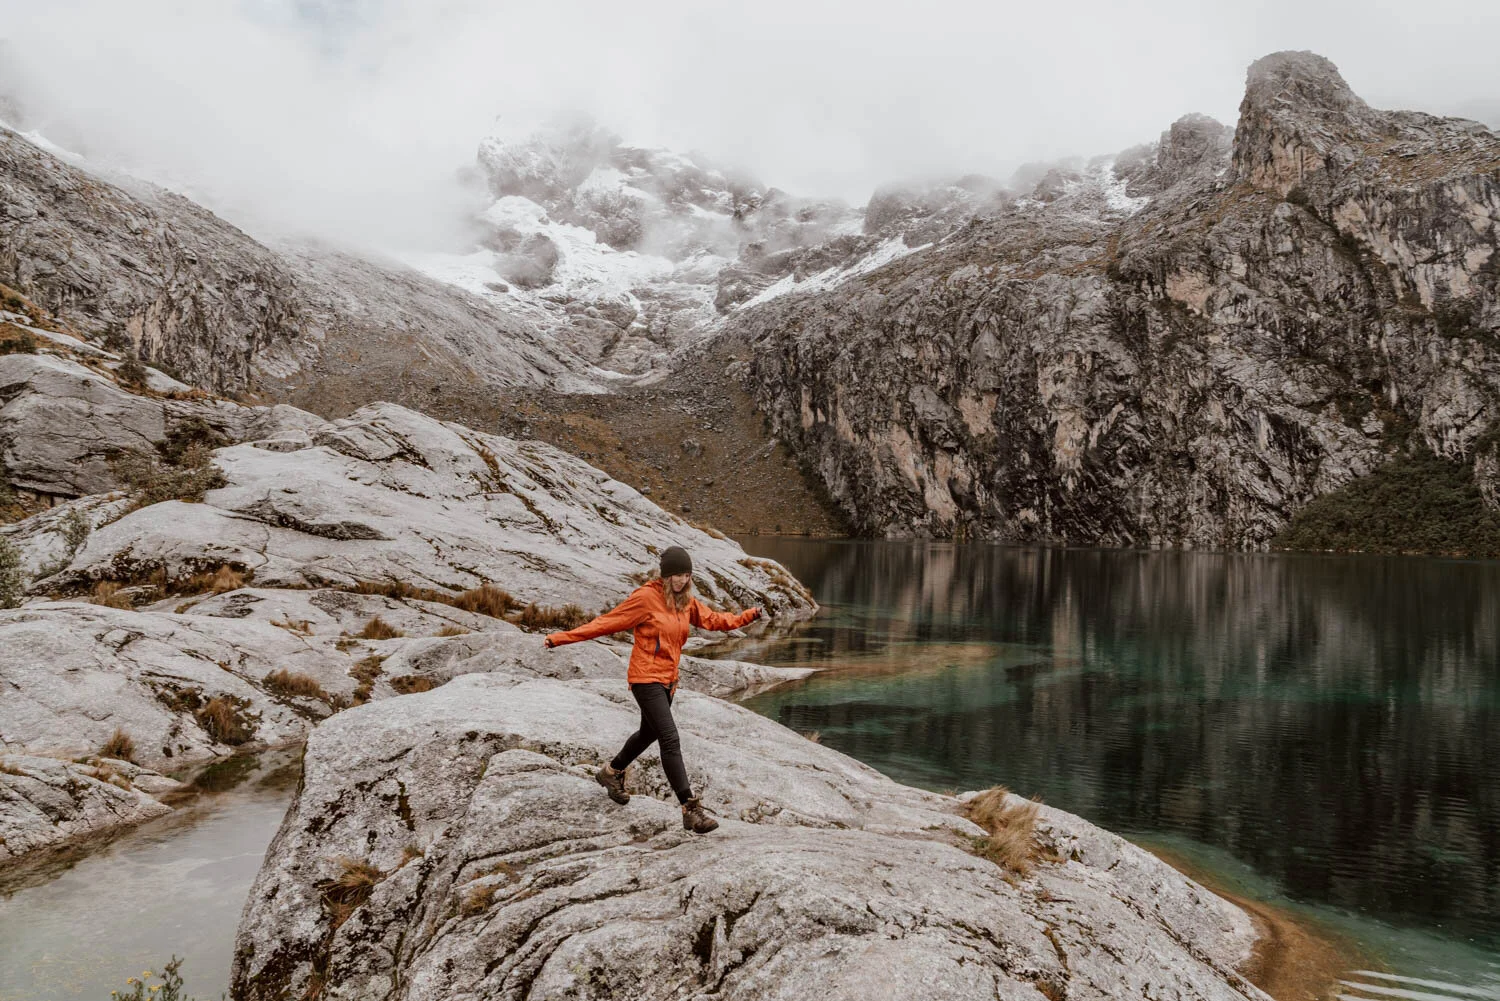
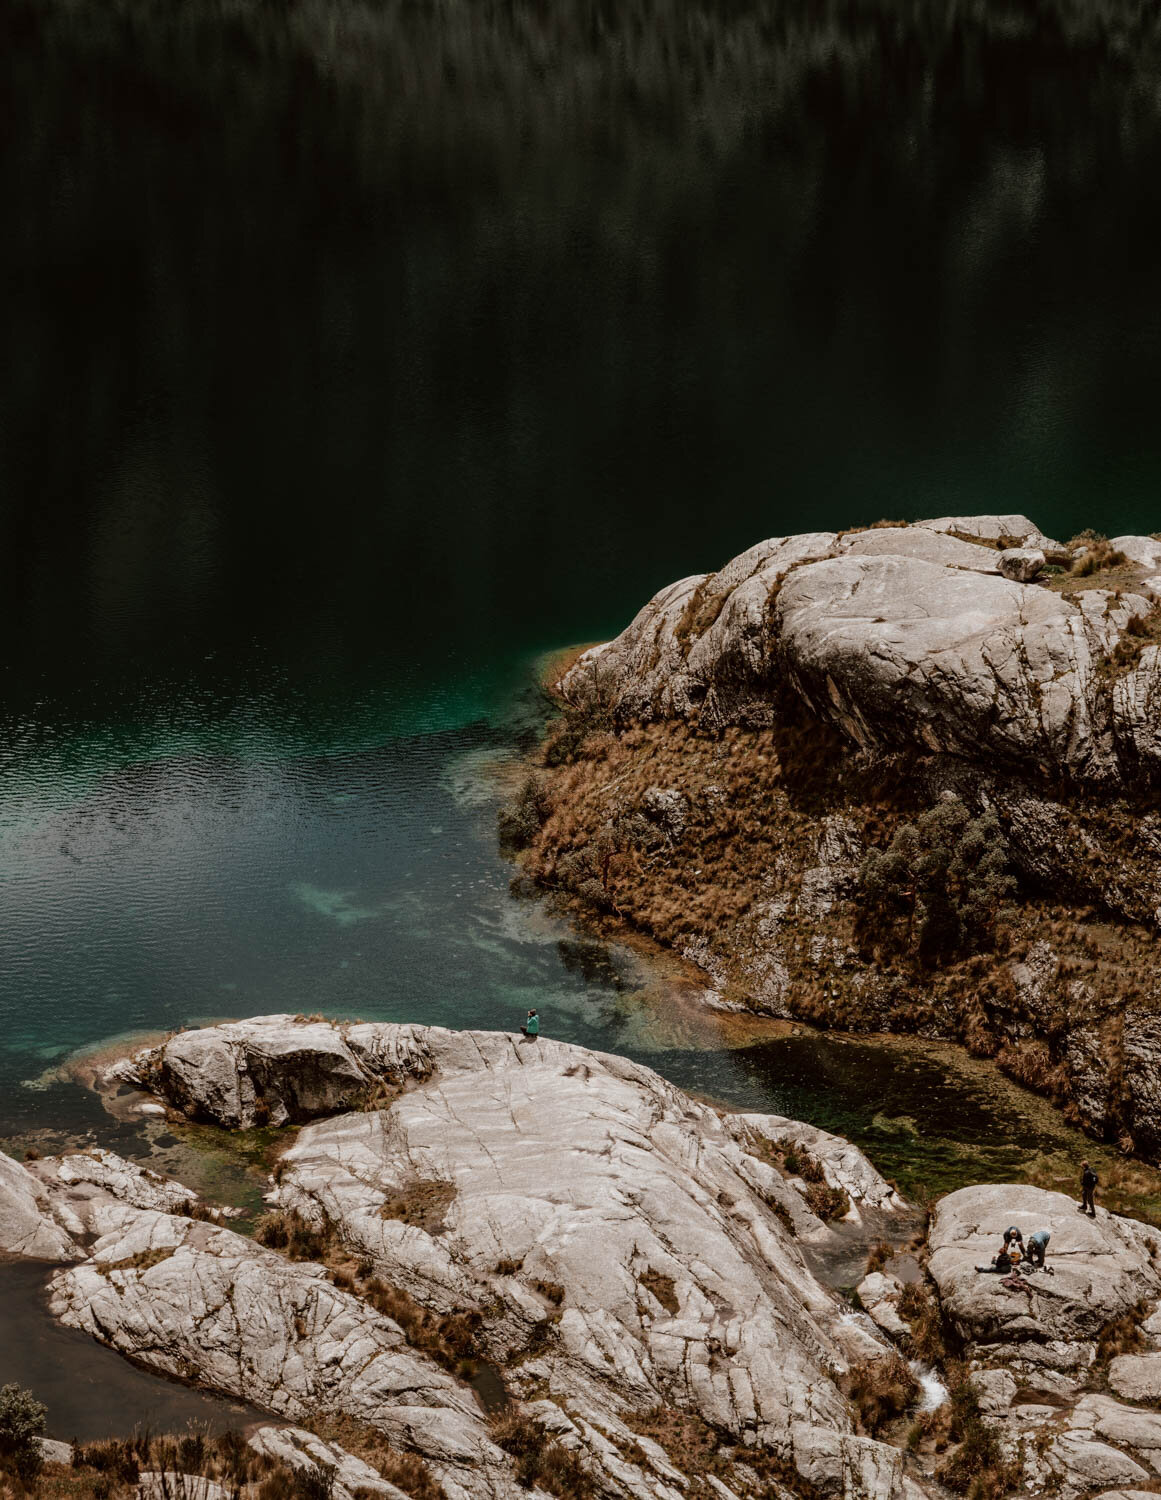
Oh, and the lake itself by the way? Absolutely stunning.
Here’s everything you need to know to visit Laguna Churup without a tour!

Laguna Churup essentials
Altitude // 4,600m at the lake’s edge
Distance // 8km round trip from the main trail start
Time // We left on a colectivo from Huaraz at 7.40 a.m. and were back in the city by 2.20 p.m. The hike itself took four hours in total (2 hours up, under 2 hours down) which included plenty photo stops.
Base City // Huaraz
Total Cost // 50 soles per person
A Complete Guide to the Laguna Churup Hike

A NOTE ABOUT ALTITUDE SICKNESS AND ACCLIMATISATION
Throbbing headache, loss of appetite, nausea, lethargy, altered sleep patterns, shortness of breath.
Also known as altitude sickness, the above are a set of symptoms that the human body can experience once passing beyond 2,500m. This is when the the air gets thinner, oxygen levels decrease and - for those not used to being at higher altitudes - your body tries to tell you that it’s not okay with that.
Usually not something many of us need to worry about, but in South America, a part of the world where there are countless mountains, lakes and even cities at heights that dwarf many of Europe’s highest peaks, higher altitudes and the potential effects of being at them are something that you will need to not only be aware of, but prepare for - in a process called ‘acclimatisation’.
And that’s exactly why when arriving in Huaraz - which is already at 3,000m - from near sea-level, you will need at least one full day of just hanging out in the city before attempting to visit Laguna Churup.
Sitting at 4,600m, this lake’s altitude is no joke, and will feel utterly horrendous if you’ve only arrived from Lima the previous day. Trust us, we’ve seen people attempt high-altitude hikes within a day of arriving into Peru. It’s not pretty, they rarely make it to the end, and they feel crappy for another few days; your body needs to get used to simply functioning on less oxygen, before you ask it to go any higher.
If you’re not exploring much of the Cordillera Blanca whilst in Huaraz, this hike will likely be a real highlight, so acclimatise and then enjoy.
Want to know more about altitude sickness in Peru and how to prevent it? See this post.
Is the Laguna Churup Hike Difficult?
How difficult you find the Laguna Churup hike honestly depends upon whether you take the rope-heavy route (more on that later), the weather conditions on the day, and how much hiking you’ve already done in Peru.
We’d call this a moderately difficult route purely because of the nature of reaching certain sections, but if this is your first hike at altitude in Peru then you will find it a bit more challenging than others who have already done several and are fully acclimatised (the quick straw poll on our collectivo back to Huaraz found this to be the main factor in how difficult people found it).
How to Get to Laguna Churup
As we mentioned in the intro, getting to the trailhead is easy-peasy, and means that taking a tour to do this hike is absolutely NOT necessary (we can’t stress this enough).
To get there from Huaraz, you need to take a colectivo heading to Pitec. As with many places in Peru, colectivos to different destinations leave from different streets across the city. Those heading to Pitec leave from Avenida Agustin Gamarra, just past where it intersects with Antonio Raymondi (it clearly states the destination on the front of the minibus). Having been told that the colectivo we needed to take left at 7 a.m., we duly arrived at 6.50 a.m. to discover that it actually departs at 7.40 a.m. However, we would absolutely recommend that you still arrive earlier. Colectivos leave when they are full, and if you happen to choose to hike on a day when many others are making the same trip, you may find that it has already left (on our collectivo there was actually only one local Peruvian, everyone else was a traveller doing the hike!).
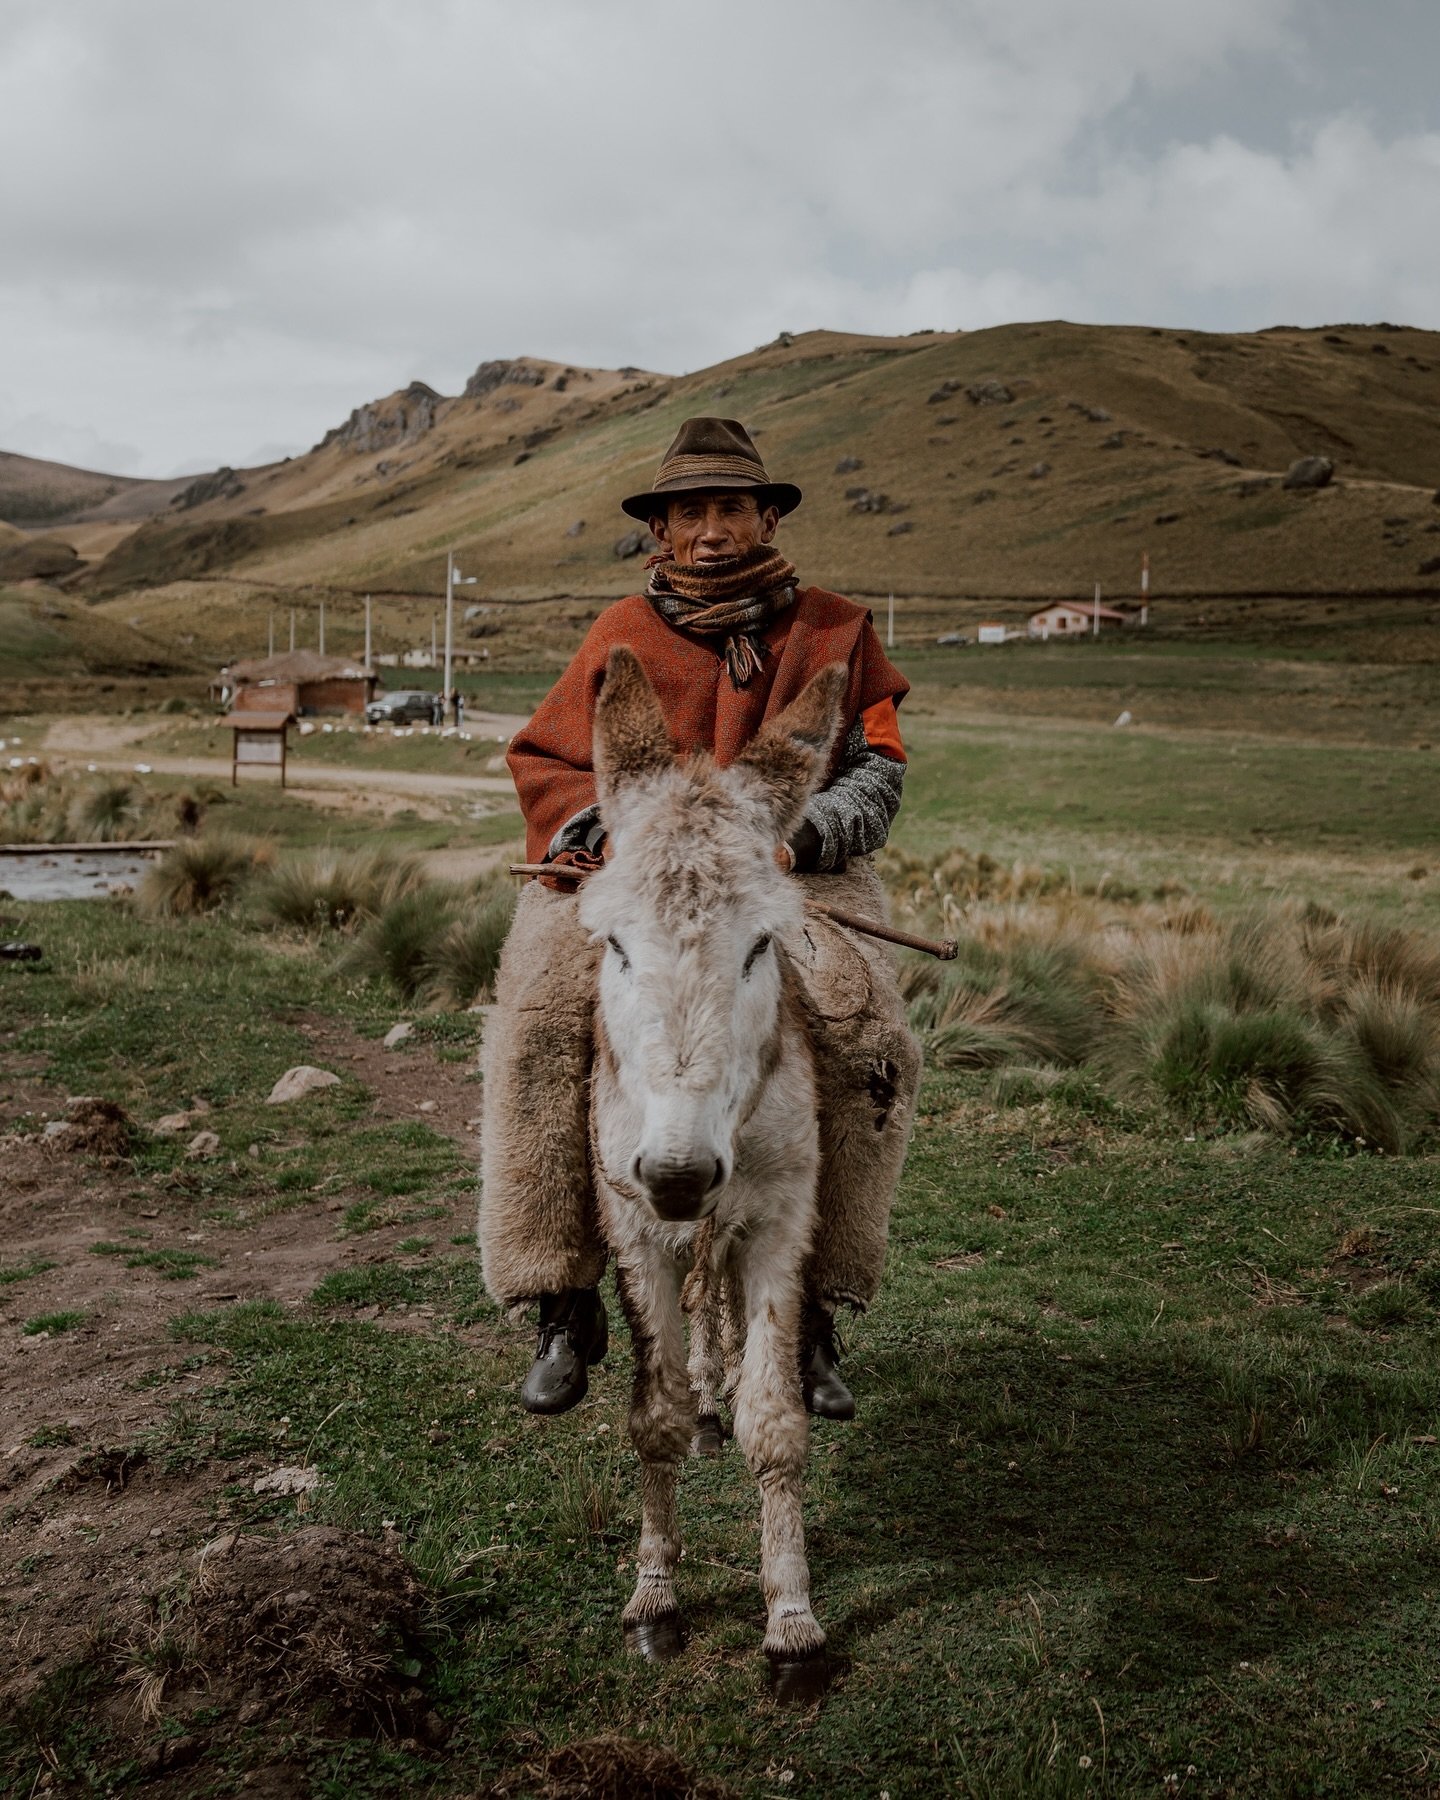
At 45 minutes, the winding drive from Huaraz is relatively short, passing through small rural villages and visibly gaining altitude, until you arrive at the carpark which signals the beginning of the hike and end of the colectivo ride.
Without asking, our driver informed us that at 1 p.m., he would be waiting for us to drive back to Huaraz, but be sure to confirm this with him once you arrive at Churup.
Time | 45 minutes
Cost | S/. 10 per person (one-way)
Tip | If you fancy tacking on a couple of hours to your hike, it’s possible to begin your trek to Laguna Churup from Llupa, a small village approximately half way between Huaraz and Pitec. Whilst we didn’t choose this option, a number of people do (three people jumped off of our collectivo to take this route).
The difficulty with this route however is that, as the colectivo back to Huaraz is at a pre-organised time, unless you are an incredibly fast hiker you will almost certainly miss your lift home - meaning you have to walk back to Llupa. Not so bad if it’s beautiful blue skies, pretty crap if you’re shattered and it’s started to pour down!
The Hike to Laguna Churup
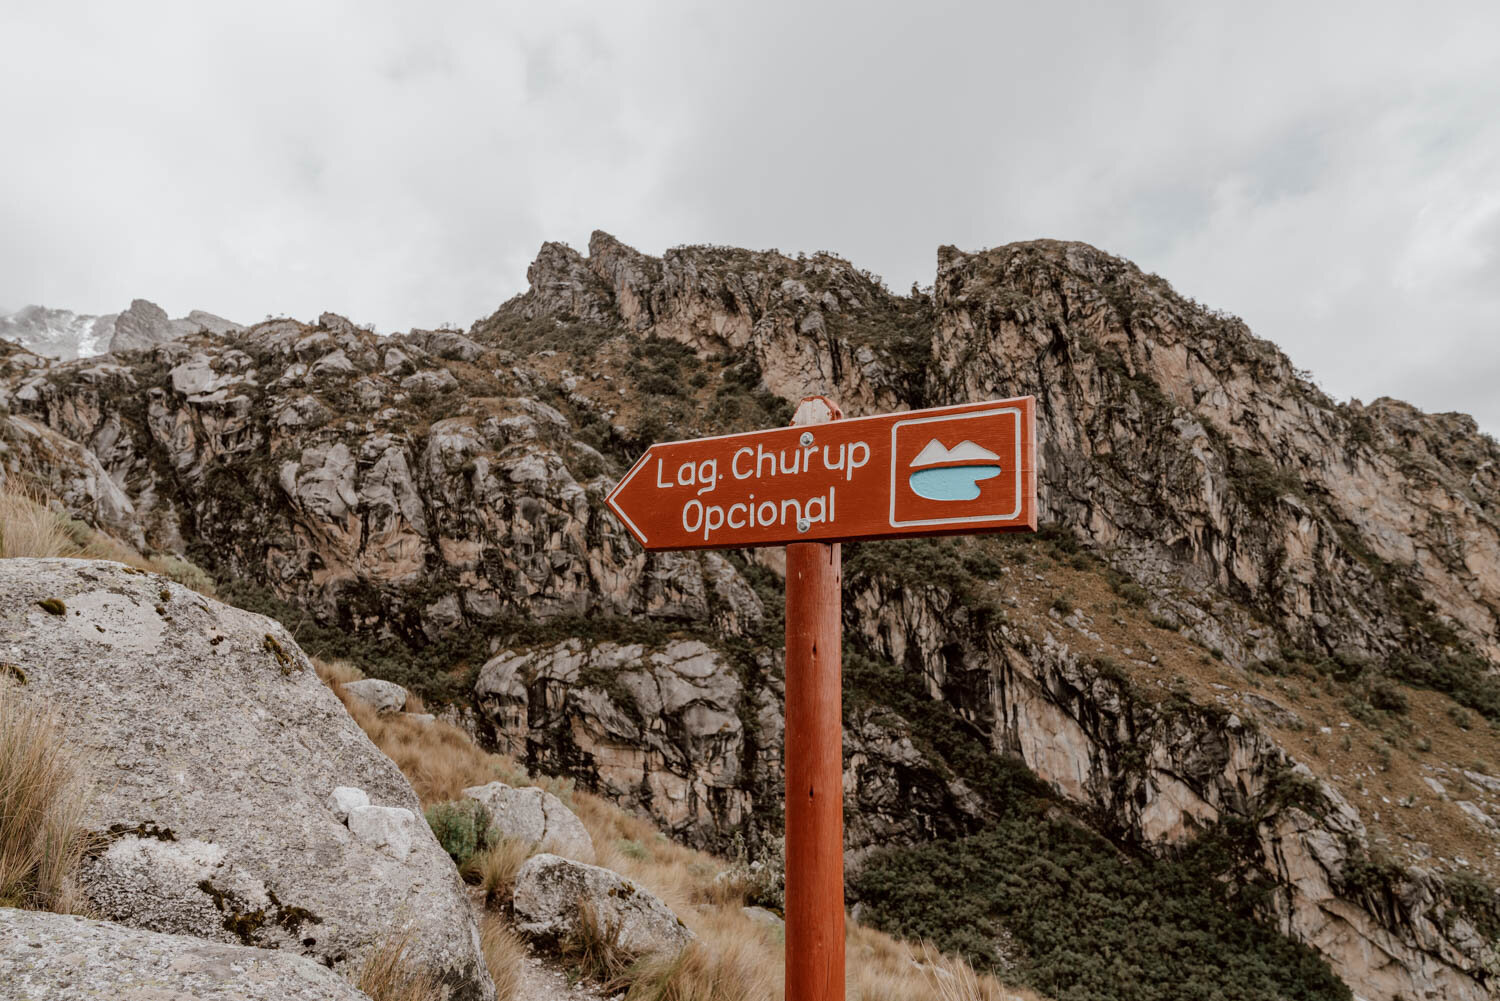
From the carpark, not only is the route well-signposted, it’s also very obvious as a clear rock-lined trail heading up; we started hiking at 8.30 a.m.
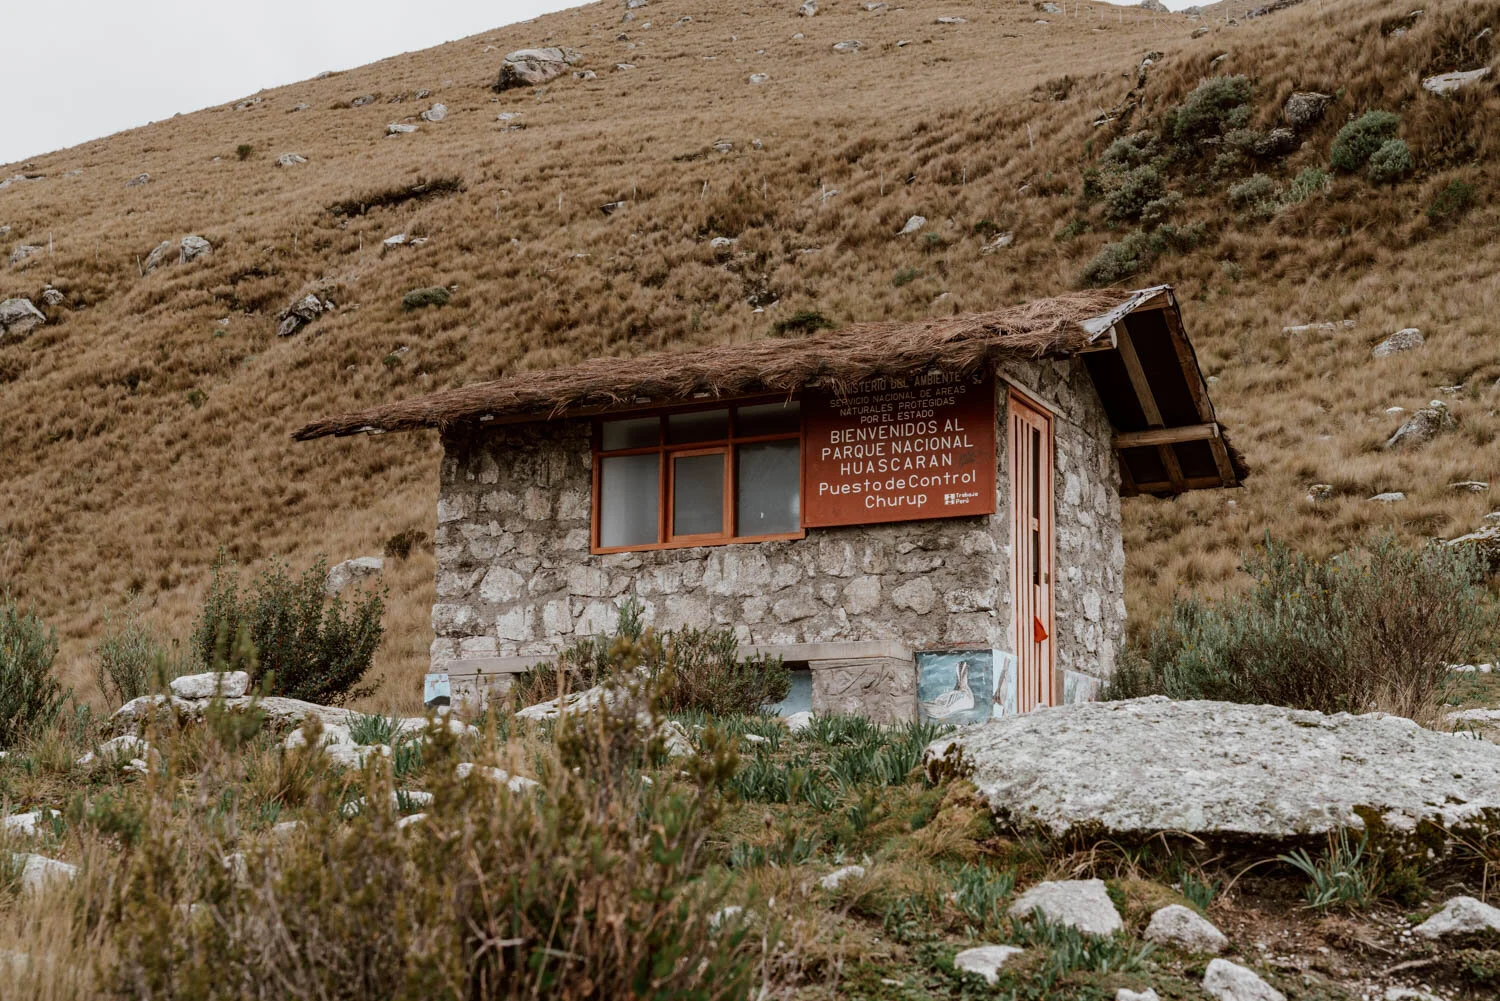
For the first twenty minutes or so, the path ascends gradually up the steps and trail until you reach a small hut where you should pay the entrance fee. With hands already deep in our pockets, we were surprised when we reached the door and discovered that no-one was there! Whether this is common, we don’t know, but be sure to have your S/. 30 ready in preparation as you’re certainly supposed to pay an entry fee (perhaps it was their day off?) As Churup is part of Huascaran National Park, we expect that those of you with the 2-3 or multi-day tickets should be able to use it here (if this turns out not to be the case, please let us know in the comments!).
Remember, if you’re new to hiking at altitude, that you should not attempt this hike without giving yourself at least one day to acclimatise in Huaraz. The start point is already at 3,800 metres, and you’ll quite quickly start to feel it if your body is not sufficiently used to the thin air - if you have no idea about altitude sickness and how to prepare for it, read this post.
Okay, remember those ropes we mentioned? Well, the good news for those that are terrified at the prospect is that the most challenging section can be avoided by taking an alternative route. The bad news however, is that there is a smaller rope section that all must conquer, not long after the aforementioned hut.
After this, it’s a little more hiking, a little more scrambling, a lot of ‘wow, look at that view’ before you reach a literal fork in the road. Want to avoid those extra ropes? Take the trail to the left and head up towards the mirador. If you’re feeling a little more adventurous however (and you really should be), then absolutely take the route to the right.
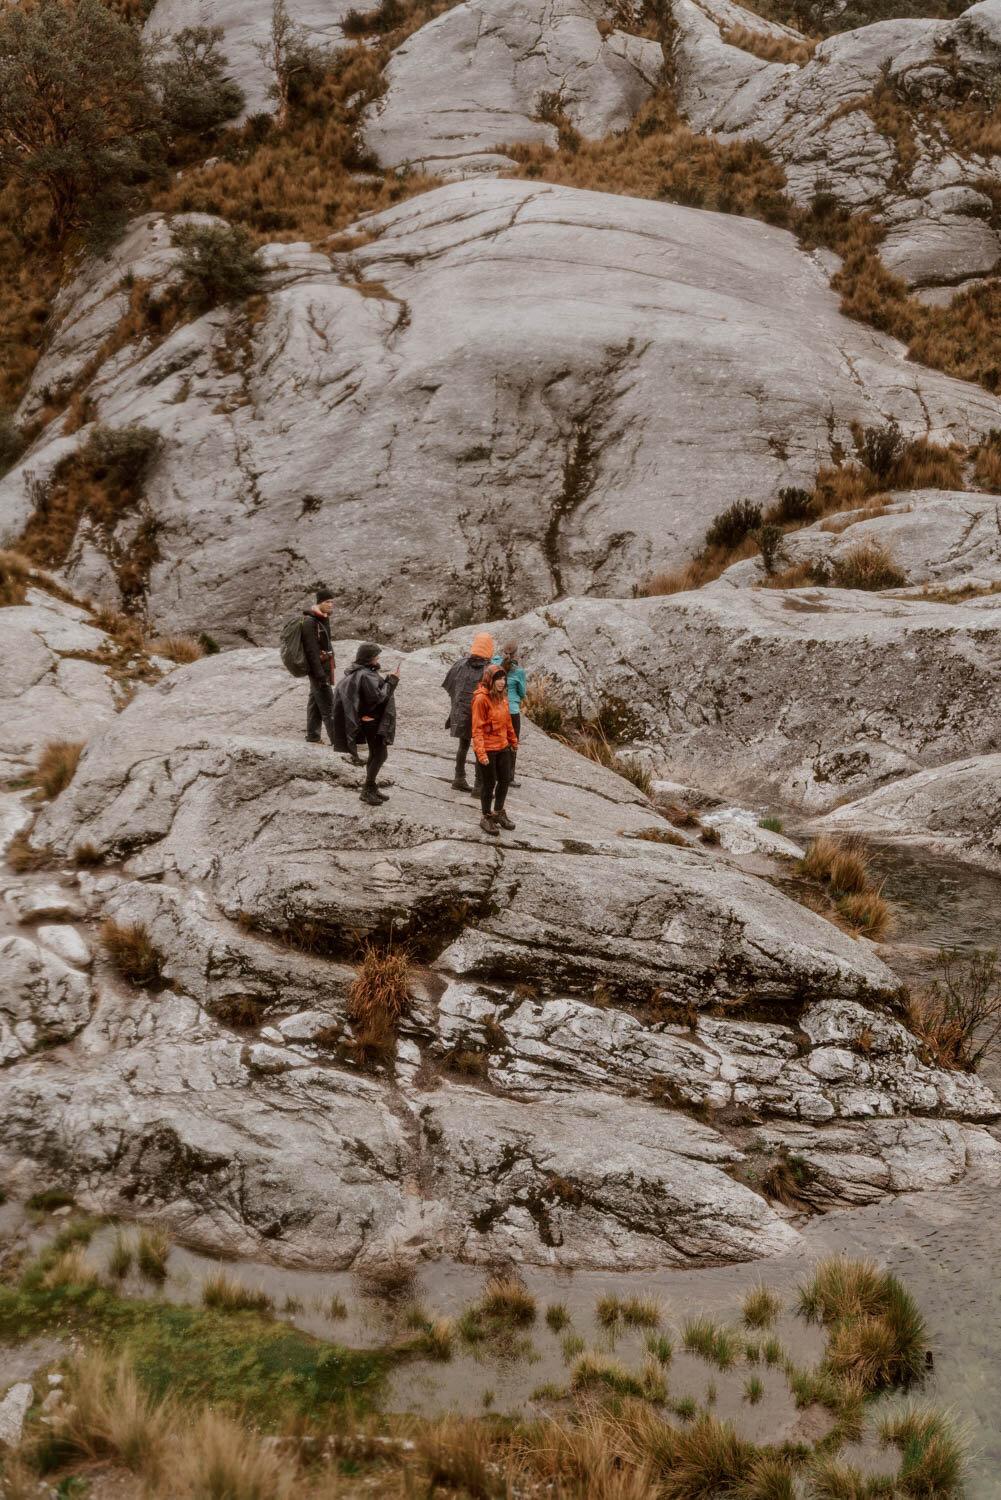
Now, let us preface the ascent up the rock face with this: Emily is the most ungraceful, uncoordinated and wholly dyspraxic individual, and Andrew has short legs. When it comes to hauling ourselves up actual cliff faces with no sort of harness, in the rain and on incredibly slippy rocks, well, we’re not the couple you’re going to put your money on making it to the top in one go. Nerves aside however, we didn’t actually find it too difficult, but we did have to give a pep talk and some rock climbing advice to a lady who arrived before us and was really struggling to navigate it - she was all set to go back and take the easier route but we managed to get her up and over by making little changes to what she was doing. Footwork people, it’s all about footwork!
Seriously though, know your own limits and don’t take unnecessary risks if you feel unsafe climbing the rocks or the conditions render it unwise.
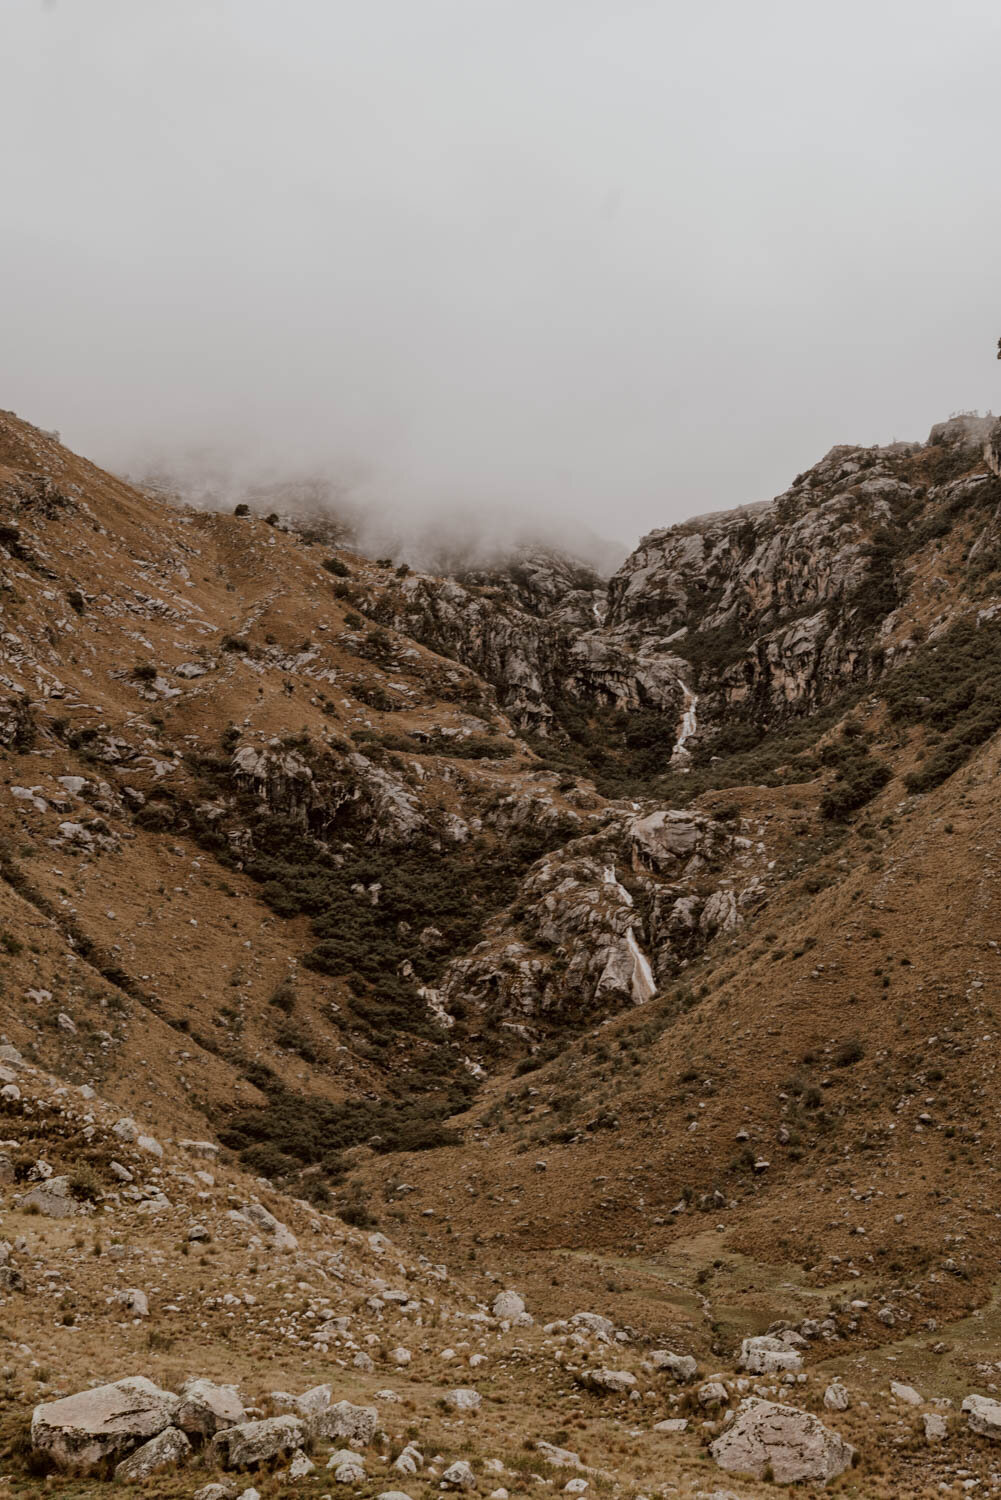
We would like to say that after here it is plain sailing, but, well, that would be a lie. Immediately after the rocks, you’ll see a waterfall, and probably, like us, assume that the route couldn’t possibly be on the other side of it. Well, it is, so take a moment to be thankful you invested in those waterproof hiking boots and make the jump!
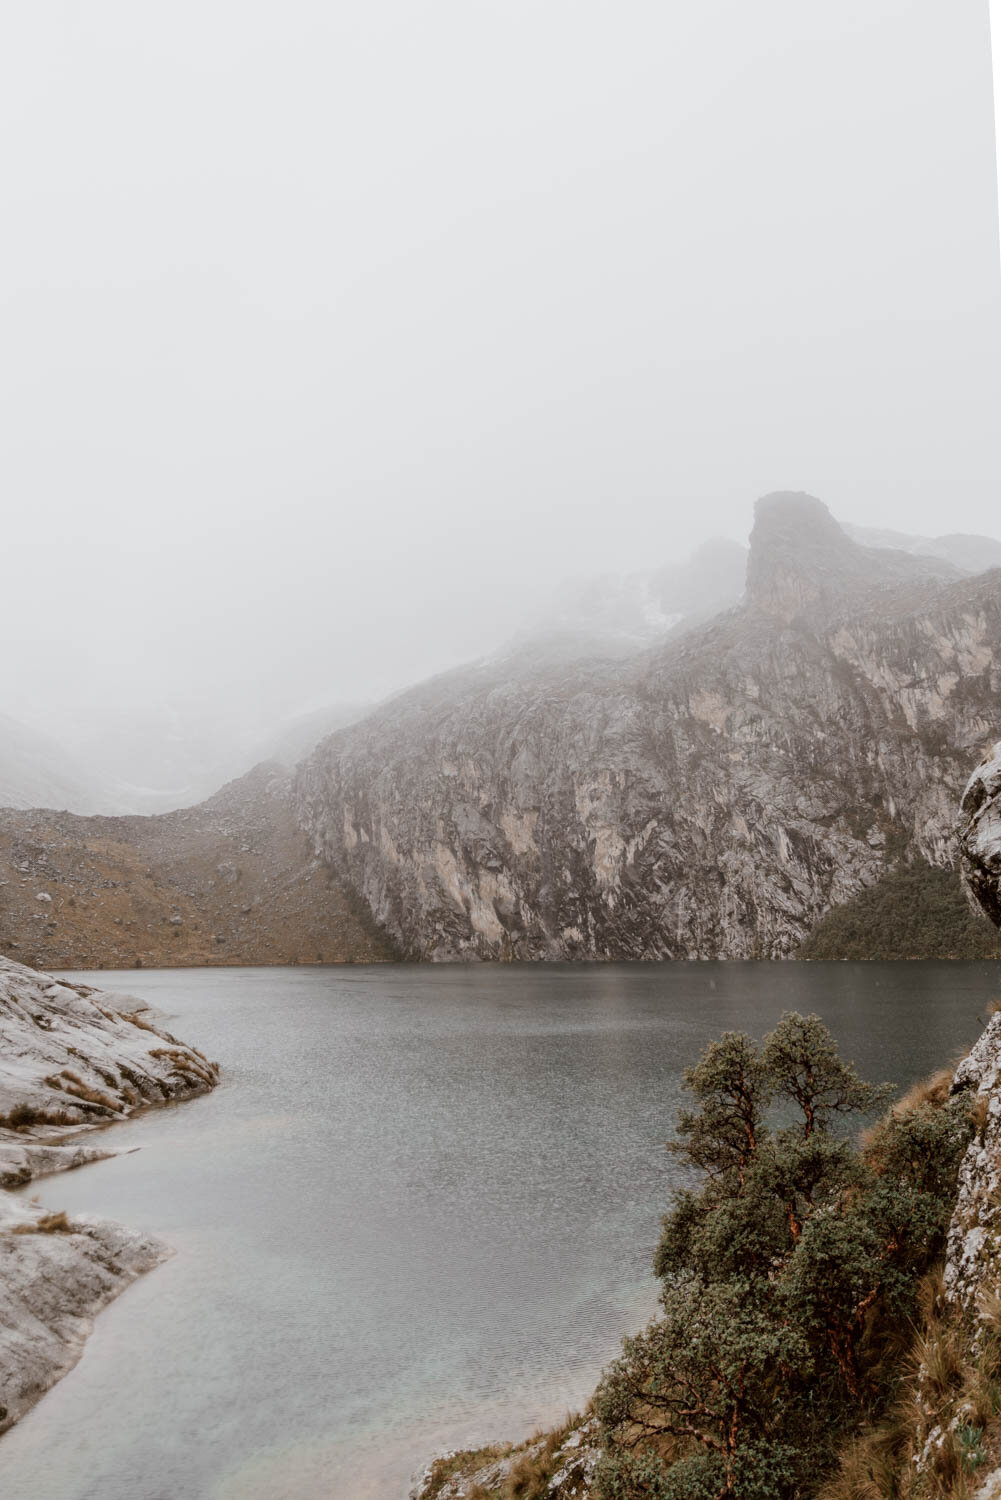
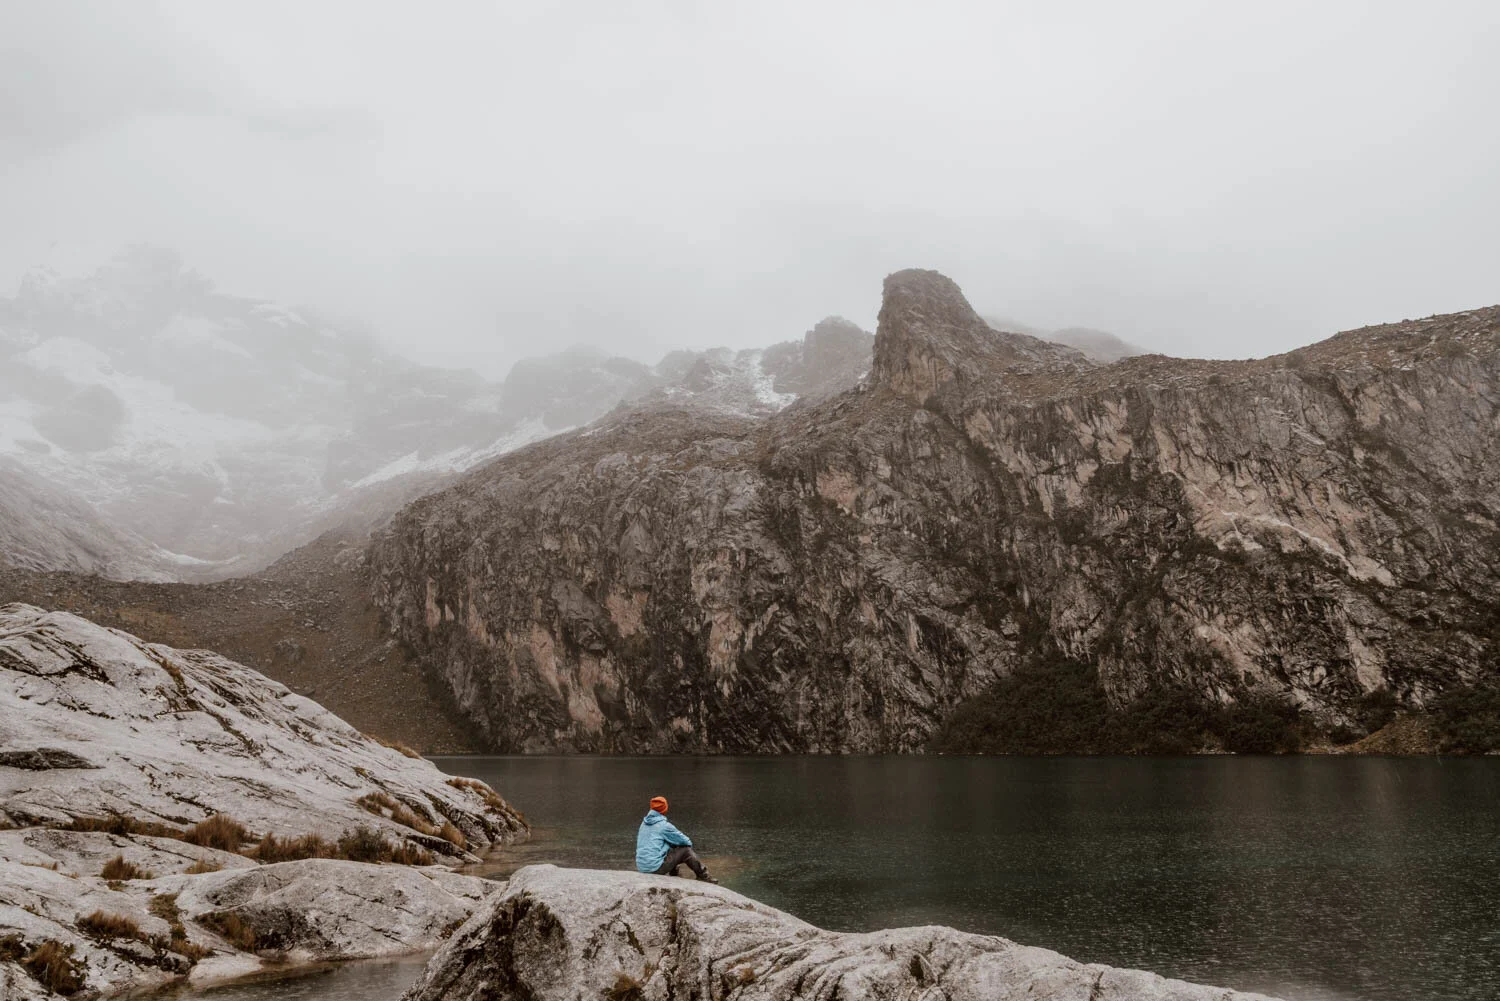
Ten minutes later however, you should find yourself at the edge of a beautiful lake at 4,450 metres altitude , a lake that even when covered in cloud makes you glad you ventured out for a hike.
Getting to this point took us around two hours at a gentle pace in the intermittent rain, and we then spent a further 30 minutes taking photos and hanging out admiring the view.
To return, you can either go back the same way you came (not recommended if you ascended with the ropes), or head up the not entirely obvious path to the mirador. The route is marked on maps.me, and is easy to follow once you identify its start point (see photo below). This route back has some wonderful views of the surrounding mountain ranges, but can be quite slippy and unstable in sections, so just watch those ankles on the rocks and try to avoid falling on your arse once or twice.
If the colectivo is picking you up at 1 p.m., then our advice is to leave the lake at 11 a.m. at the absolute latest. It took us under two hours to get back down - via a stop and some photos at the mirador - but we were really picking up the pace towards the end to make sure we didn’t miss that bus.
If you do miss it, then you have three options:
Stick around and hope that another one will arrive / try to catch a ride from the car park
Walk onward for 1-2 hours to Llupa and find a colectivo (it’s not a busy road though so you may have to wait a little while)
Pray
So yeah, try not to miss that bus back to Huaraz!
Our colectivo driver was a decent old guy who had obviously run this route many many times; despite the time, he waited an additional 25 minutes after spotting two people descending the trail, assuming that they were hikers that had jumped off our bus at Llupa earlier. They weren’t, but it’s nice to know he cared enough to wait. The colectivo and your fellow passengers may wait around for you for a short while, but our advice is to really prioritise getting back by the agreed pick-up time.
Things to know before Hiking to Laguna Churup
Beyond the above instructions, there are a few things to know before taking on this hike.
// Take snacks and water. We genuinely prefer to hike on empty stomachs, but we always bring a few snacks to sustain us during hikes. For this particular trek, we had brought sandwiches we made back in the hostel but with temperatures at the water’s edge being pretty darn chilly, we didn’t feel much like having a little picnic. Instead, nuts, dried fruit, and the hiker’s saviour of granola bars came in pretty handy.
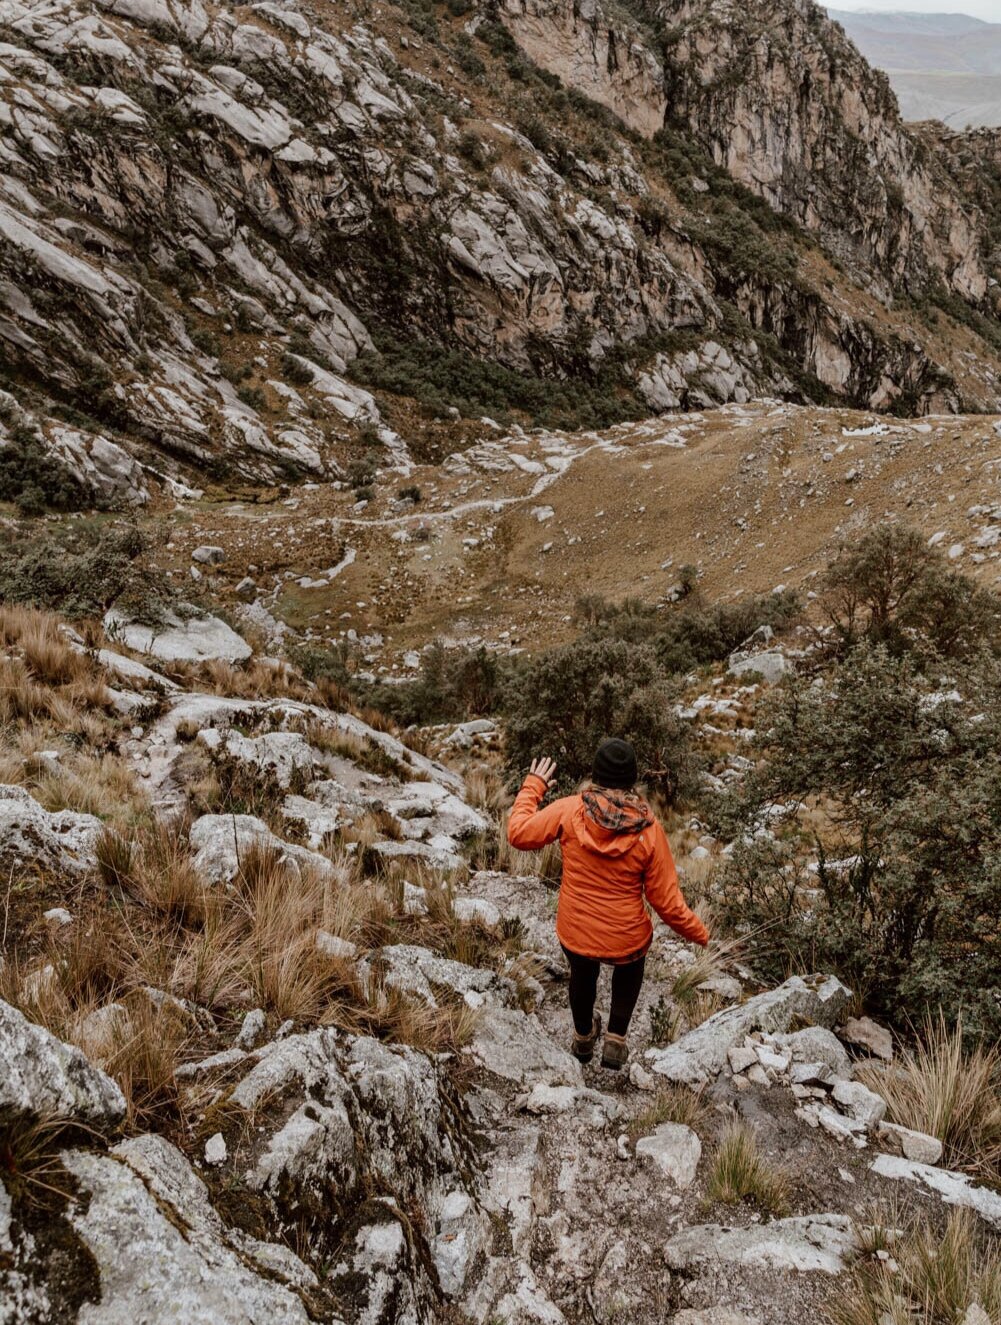
// The weather can be very temperamental. In December, we had thick fog, heavy rain, strong winds and clear blue skies - all in the space of few hours - whilst a thunder and lightning storm chased us back down to the bus. It was also very cold! So cold in fact, that the pair of gloves Andrew had assumed had been taking up room in his bag in vain came in very handy. Hiking it in dry season will of course mean more reliable conditions.
// Wear the right clothing. Lots of layers, good hiking boots, proper socks, waterproof jackets and warm fleeces; we wore it all on this hike. See more in our ‘What to Pack’ section below.
// There are rustic toilets at the start of the hike, but bring your own toilet paper.
// The app Maps.Me has the trail route on it if you’d like to have some additional peace of mind whilst out on the mountains.
// Be a responsible traveller and don’t leave any trash, and treat the area with the respect it deserves.
What to Pack for the laguna churup hike
As with any hike, anywhere in the world, it’s imperative that you embark upon the trek to Laguna Churup prepared for - almost - any eventuality, and with the right type of kit.
Of course, you don’t need the fanciest of clothing or the most expensive boots, but there are some items that every smart hiker will have in their kit.
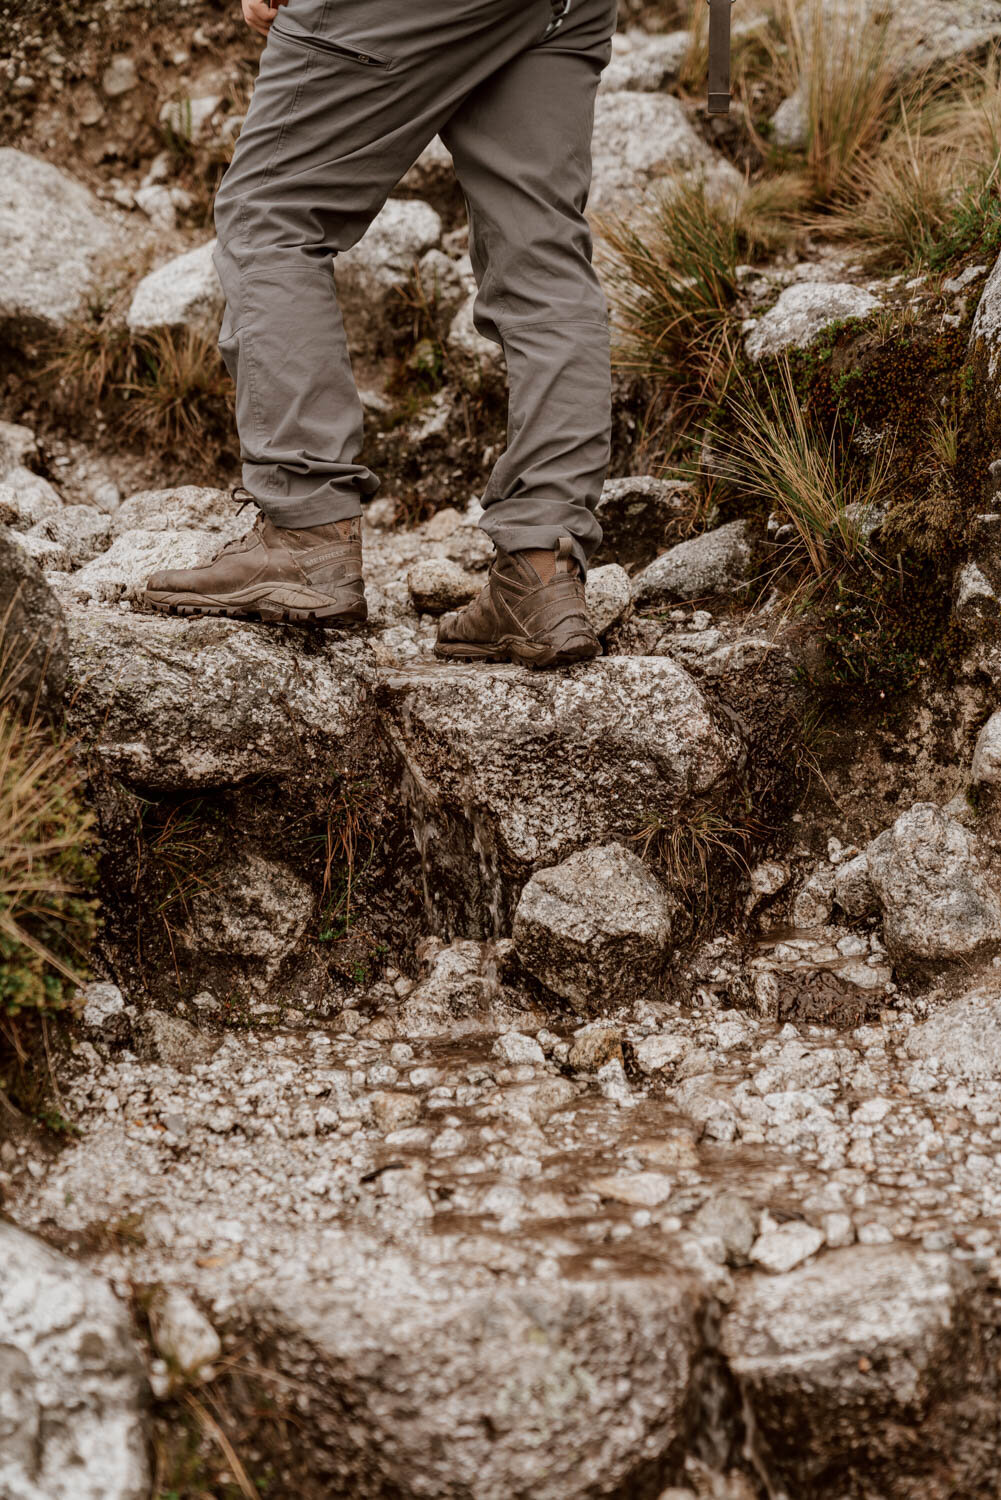
// Good hiking shoes. Mud, snow, rocks, uneven terrain and the damn rock climbing gauntlet odd means that good hiking shoes (ideally boots like these) are absolutely essential for this hike. Seriously, do not even consider attempting it in a pair of converse! Trekking trainers may suffice, but we were both very grateful for the extra ankle support provided by a solid pair of boots.
// Charged Phone. These are popular hikes, and even if you’re not undertaking them as part of a tour, there will usually a few people around. However, things can, and do happen, and should you get unlucky, stranded, or injured, having the ability to call for help is very important - you may not always have signal, but we often had the odd bar of reception on various sections.
If you phone battery can’t be relied upon, consider investing in a portable charger - we use this one.
Additionally, it’s useful to have an offline version of a map of the area, hopefully with the route on. If you’re not sure how to do this, see our helpful guide.
// Layers. Even if you’re visiting during the drier months of the year, the weather in here can be a tad unpredictable - and in our case, downright miserable! Layers will be your friend, allowing you to strip off slowly as the weather - and you - warm up. We appreciated our Merino wool under layers so much that they almost became like a second skin, and those gloves we mentioned - a god send!
// Waterproof Jacket. This hike would have been unmanageable were it not for our waterproof jackets. They’re breathable, windproof, lightweight and bright enough that even in a rain storm we could usually spot one another - which on this hike was very fortunate!
// Hiking Poles. Whilst we did have a collapsible set of travel hiking poles snaffled away in our backpacks, we didn’t use them for the majority of this hike, only taking them out for a particularly precarious downhill section that was super slippy in the rain. If you have bad knees or would prefer a little support, then it’s sensible to bring a set.
// A Head Torch. Should everything go to plan, this should never need to be used. If on the other hand you get a little lost or take a little longer and the sun begins to go down, you’ll be glad to have a light source to guide the way.
// A Small First Aid Kit. Again, hopefully you’ll never need it but having a few supplies in case something bad happens is always a good idea. Ours certainly came in handy when Emily got bit by a stray dog 25km into a 30km hike.
// Leave No Footprints. Remember to respect the location, and discard of any litter appropriately.
// A Camera. Honestly, this lake is so incredibly stunning, you’re going to want to photograph every inch of it! Find out what’s in our camera bag.
// Travel Insurance. Most travel insurance policies exclude cover for activities at high altitude - which means that as standard, if anything was to happen whilst you were exploring Laguna Churup, the Huascarán National Park - or possibly even the city of Huaraz - you may be screwed. It’s therefore essential that you ensure yours is up to scratch for your South America trip - both True Traveller and World Nomads offer coverage options for high altitude hikes.